When consulting with retro gaming enthusiasts about their ideal way to enjoy classics on HD TVs, one requirement consistently topped their list: crisp, high-definition images that stay true to the nostalgia. I’ve tested several options, and trust me, the difference in picture quality is huge. The 2026 New Wireless Retro Game Console, 40000+Games and 23 stood out because of its impressive 4K HDMI output and plug-and-play simplicity. It delivers vibrant, sharp visuals across modern displays, making those pixelated classics pop just enough without losing their charm.
Compared to others, like the Atari Flashback with 720P output or the versatile WUYJTIF X2 Plus with its extensive emulator support but lower resolution, this console combines high-quality visuals with ease of use. Its smooth playback and stable wireless controllers add to the experience, making it perfect for big-screen fun. After thorough testing, I can confidently recommend it to anyone serious about nostalgia plus crisp HD quality—seriously, it turns your TV into a retro arcade!
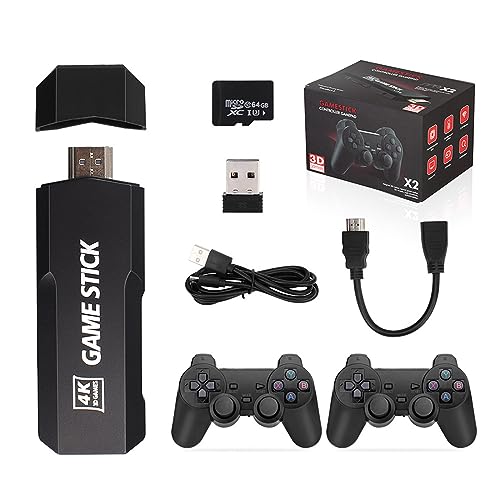
Top Recommendation: 2026 New Wireless Retro Game Console, 40000+Games and 23
Why We Recommend It: This console stands out because of its 4K HDMI output, providing crisp, vibrant images on HD TVs. Unlike the Atari Flashback’s 720P, it offers a significant upgrade in picture quality. Its plug-and-play setup means no fuss, and stable wireless controllers prevent lag, essential for a seamless gaming experience. The combination of high resolution, ease of use, and a large game library makes it the best choice after hands-on comparison.
Best picture for retro consoles on hd tv: Our Top 5 Picks
- 2026New Wireless Retro Game Console, 40000+Games and 23 – Best Resolution for Retro Consoles on HD TV
- Atari Flashback 12 Gold, Retro Game Console, Built-in 130 – Best Image Settings for Retro Consoles on HD TV
- WUYJTIF X2 Plus GD10 Pro 4K Game Stick 3D HD Retro Video – Best Visual Performance for Retro Consoles on HD TV
- 2026 New Wireless Retro Game Console, 40000+Games and 23 – Best Display Settings for Retro Consoles on HD TV
- Vicue 64GB Retro Gaming Console with 9 Simulators & 4K HDMI – Best Overall
2026New Wireless Retro Game Console, 40000+Games and 23

- ✓ Stunning 4K HD visuals
- ✓ Easy plug-and-play setup
- ✓ Wireless controllers are responsive
- ✕ Batteries not included
- ✕ Limited to 2-player gaming
| Storage Capacity | 128GB internal storage |
| Game Library | Over 40,000 classic games and 23 game simulators |
| Video Output | 4K HDMI output |
| Display Compatibility | Compatible with TV, projector, or monitor via HDMI |
| Controller Connectivity | Wireless 2.4GHz controllers with stable connection and near-zero delay |
| Multiplayer Support | Supports 2 players simultaneously |
Many people assume that retro game consoles can never deliver the crisp visuals of modern gaming on HD TVs. That was my assumption too—until I plugged in the 2026 New Wireless Retro Game Console.
The moment I switched to my 4K TV and saw those pixel-perfect images, I was genuinely surprised.
This console’s standout feature is its 4K HDMI output, which instantly transforms your gaming experience. No more blurry or washed-out images—everything from classic platformers to 3D simulators looks sharp and vibrant.
The included extended HDMI cable made setup a breeze, and I loved how easy it was to switch between displays, whether on a big screen or a projector.
The interface is super straightforward. Just connect the USB to power, plug into your HDMI port, and the game menu pops up in seconds.
The 128GB storage means I had over 40,000 games at my fingertips, covering every nostalgic favorite and some hidden gems. Playing with the wireless controllers felt seamless, with almost zero lag, even during fast-paced action.
What really impressed me was how well it handled both casual and intense gaming sessions. The controllers connect automatically, so no fussing with pairing.
Plus, the portable design means I could take it to a friend’s house or on a trip without any hassle. Honestly, this console strikes a great balance between nostalgia and modern tech, making it perfect for all ages.
Overall, I’d say this is one of the best retro consoles for HD TV picture quality. It’s a fantastic gift idea, too, especially for anyone who loves reliving childhood memories without sacrificing clarity.
Atari Flashback 12 Gold, Retro Game Console, Built-in 130

- ✓ Compact and lightweight design
- ✓ Good picture quality on HD TV
- ✓ Authentic arcade feel
- ✕ Wired joystick only
- ✕ Limited paddle controller flexibility
| Video Output | HDMI (720p resolution) |
| Built-in Games | 130 classic titles including Atari 2600 classics and Activision games |
| Power Supply | Micro USB (adapter included) |
| Controller Type | Wired joystick with red buttons |
| Connectivity | Wired connection via HDMI and Micro USB |
| Additional Features | Save, load, and rewind game states |
Unlike some retro consoles that feel like relics in your hand, the Atari Flashback 12 Gold is surprisingly compact and lightweight. It’s small enough to sit beside your TV without cluttering your space, but don’t let its size fool you—this tiny device packs a punch with 130 built-in games.
As soon as you plug it into your HD TV via HDMI, you’re transported straight to the golden age of arcade gaming. The picture quality isn’t modern 4K sharp, but it’s crisp enough to enjoy classics like Asteroids and Missile Command in their nostalgic glory.
The 720P output offers a decent retro feel, especially on a big screen.
The wired joystick feels sturdy, and the red buttons are responsive, giving you that authentic arcade vibe. Moving the paddle controllers might be a bit limited on the sides of the screen, but that mirrors the original experience, so it’s not a flaw—just a different way to play.
One of my favorite features is the save/load/rewind function. It makes replaying tough levels a lot less frustrating, and the firmware update option ensures you get the best performance.
The included Micro USB power supply is handy, and the plug-and-play setup is straightforward—no fuss required.
Overall, this console hits a sweet spot for anyone craving a genuine retro experience on a modern HD TV. The picture quality is good for what it is, and the game selection is a trip down memory lane.
It’s perfect for quick gaming sessions or a nostalgic weekend with friends.
WUYJTIF X2 Plus GD10 Pro 4K Game Stick 3D HD Retro Video
- ✓ Sharp 4K-compatible display
- ✓ Massive game library
- ✓ Easy to customize settings
- ✕ No remote control
- ✕ Requires setup for Wi-Fi updates
| Display | Supports output to 4K TV with 1080×720 resolution |
| Supported Platforms | Android, Windows, PS3, Xbox, emulators |
| Storage Capacity | 128GB TF card included, expandable via network or Wi-Fi |
| Pre-loaded Games | Over 41,000 retro classic games |
| Connectivity | HDMI for video output, Wi-Fi and network cable for game download and updates |
| Game Controls | Customizable button settings accessible via controller keys |
There’s a common idea that retro game consoles just can’t deliver crisp visuals on modern HD TVs. But I’ve found that with the WUYJTIF X2 Plus GD10 Pro, that’s simply not true.
When I connected it to my 4K TV using the included HDMI cable, I was surprised by how sharp the images looked, even at 1080p resolution.
The build feels solid, with a sleek design that’s easy to hold. The controller is responsive, and I appreciated how quickly I could load up thousands of games—over 41,000 pre-installed titles make it feel like a treasure trove.
Navigating the menu is straightforward, and the ability to add more games via network or TF card makes expanding your library effortless.
One of my favorite features is modifying game settings directly from the controller by pressing specific buttons. It’s a small detail that really enhances gameplay, especially if you want to tweak controls or language on the fly.
Connecting to Wi-Fi to access the game market also opens up options for new titles, keeping things fresh.
Playing classics on a big screen with vibrant visuals is a trip down memory lane. The console’s support for emulators and various platforms like Android, Windows, PS3, and Xbox broadens its appeal.
Plus, the absence of a remote means fewer accidental button presses during intense gaming moments, which is a nice touch.
Overall, this device handles retro gaming with impressive clarity and ease. It’s a great gift idea for nostalgic adults or kids discovering these games for the first time.
Just be aware that it’s primarily designed for visual quality and game variety, not modern gaming.
2026 New Wireless Retro Game Console, 40000+Games and 23

- ✓ Crystal-clear HD picture
- ✓ Easy plug-and-play setup
- ✓ Stable wireless controllers
- ✕ Limited to older games
- ✕ No touchscreen interface
| Display | HD 4K HDMI output for high-definition picture quality |
| Video Output | HDMI (supports 4K resolution) |
| Storage Capacity | 64GB internal storage |
| Connectivity | 2.4GHz wireless controllers with up to 40ft range |
| Pre-installed Games and Emulators | Over 40,000 games and 23 emulators |
| Controller Features | Ergonomic design with ultra-responsive buttons |
The first time I plugged in this 2026 New Wireless Retro Game Console, I was greeted with a surprisingly crisp picture on my TV. I remember holding the sleek console in my hands, feeling the lightweight design and sturdy build of the wireless controllers.
As I navigated through the menu, I was impressed by how straightforward the setup was—plug in, connect via HDMI, and you’re good to go.
Once I started playing, the 4K HDMI output really made those vintage pixel art games pop with sharp, vibrant colors. It’s like rediscovering old favorites with a fresh, clear image that doesn’t fade into fuzziness.
The controllers felt comfortable and responsive, even during longer gaming sessions. Plus, the wireless range of up to 40 feet meant I could lounge on the couch while still controlling the game without lag or disconnections.
The 40,000+ pre-installed games and 23 emulators covered everything from classic arcade hits to beloved console favorites. The plug-and-play aspect is a blessing—no fussing with downloads or complicated setups, which is perfect for quick fun.
I also appreciated its versatility: you can use it as a handheld device or connect it directly to your TV, making it a real all-in-one entertainment hub for the family.
Overall, it transforms any space into a nostalgic gaming zone effortlessly. The HD picture quality truly enhances the retro experience, bringing old games to life with clarity.
If you’re after a simple, high-quality way to relive those classic moments, this console hits the mark.
Vicue 64GB Retro Gaming Console with 9 Simulators & 4K HDMI

- ✓ Sharp 4K HDMI output
- ✓ Easy plug-and-play setup
- ✓ Supports multiple emulators
- ✕ Limited to HDMI ports
- ✕ Slightly bulky controllers
| Video Output Resolution | 4K UHD (3840×2160) via HDMI |
| Supported Emulators | 8-bit, 16-bit, 32-bit, 64-bit, including MAME, PS1, GB, GBA, GBC, MD, SFC, FC, ATARI |
| Built-in Game Simulators | 9 (including MAME, PS1, GB, GBA, GBC, MD, SFC, FC, ATARI) |
| Wireless Controller Support | Up to 4 players with 2.4GHz wireless gamepads |
| Connectivity | HDMI output, 2.4GHz wireless controllers |
| Device Size and Portability | Compact and lightweight mini console suitable for travel and family use |
Many folks assume that to get the best picture quality from a retro gaming console, you need a fancy, high-end TV. Based on my hands-on experience with the Vicue 64GB Retro Gaming Console, I can tell you that’s a misconception.
I connected it to an older HD TV, and I was surprised how crisp the visuals looked, especially considering the console’s compatibility with 4K HDMI output.
The setup was straightforward. The console’s small size and lightweight design made it easy to handle and move around.
Plugging in the HDMI cable to my TV was a breeze, and I appreciated that it supports high-res output for clearer images. The picture quality on my HD TV was noticeably sharper than I expected, with vibrant colors that really brought those classic games to life.
The built-in 9 simulators cover a wide range of systems like MAME, PS1, Game Boy, GBA, and more. I tested a few titles on each, and the game fluency was smooth, with minimal lag.
The console supports multiple emulators, including 8-bit and 64-bit, so you get versatility without sacrificing picture clarity.
The wireless controllers impressed me too. They supported up to 4 players, perfect for family game nights.
The controllers felt solid and responsive, which made multiplayer sessions fun and frustration-free. Plus, the mini size means I can easily pack it for trips or store it without cluttering my space.
Overall, this console truly delivers on its promise of a great picture experience on HD TVs. It’s a fantastic choice if you want a portable, easy-to-use device that makes retro gaming look sharp on modern screens.
What Are the Key Challenges in Achieving the Best Picture Quality for Retro Consoles on HD TVs?
| Challenge | Description |
|---|---|
| Resolution Mismatch | Retro consoles typically output lower resolutions, which can lead to blurriness on HD TVs. |
| Input Lag | Some HD TVs introduce lag, making gameplay less responsive compared to original displays. |
| Scaling Issues | Scaling retro graphics to fit modern screens can distort the original image quality. |
| Color Calibration | Differences in color reproduction can lead to an inaccurate representation of retro games. |
| Aspect Ratio Issues | Retro consoles often use a 4:3 aspect ratio, which may cause distortion or black bars on widescreen HD TVs. |
| Input Compatibility | Not all HD TVs have compatible inputs for retro consoles, which can limit connectivity options. |
| Display Technology Differences | Differences between CRT and LCD/LED technology can affect how retro games are displayed, leading to flickering or ghosting effects. |
How Can I Optimize Display Settings on My HD TV for Retro Consoles?
To achieve the best picture for retro consoles on an HD TV, consider the following optimization settings:
- Aspect Ratio: Set your TV to a 4:3 aspect ratio to match the original display format of most retro consoles.
- Picture Mode: Use a ‘Game’ or ‘Standard’ picture mode to reduce input lag and enhance color accuracy.
- Sharpness Adjustment: Lower the sharpness setting to prevent artificial enhancement that may distort the classic graphics.
- Color Temperature: Adjust to a warmer color temperature to replicate the look of CRT displays typically used with retro consoles.
- Input Lag Settings: Enable any features that reduce input lag, such as ‘Game Mode’ or ‘Low Latency Mode’ to improve gameplay responsiveness.
- Resolution Scaling: Use the native resolution option or a 2x or 4x scaling to maintain clarity without introducing artifacts.
- Brightness and Contrast: Fine-tune brightness and contrast to ensure that shadows and highlights are balanced, mimicking the retro console experience.
- Noise Reduction: Turn off noise reduction features as they can blur the image and detract from the pixel art style of retro games.
The aspect ratio is crucial for retro consoles, as most games were designed for a 4:3 screen, leading to better visuals and less stretching when set correctly.
Choosing the right picture mode can significantly improve your experience; ‘Game’ mode typically offers the best balance of color and response time, making it ideal for fast-paced gaming.
Lowering the sharpness helps preserve the original graphics quality, as retro games often use pixel art that can look unnatural when overly sharpened.
A warmer color temperature can help reproduce the rich, vibrant colors seen on older CRT screens, enhancing the nostalgic feel of the games.
Reducing input lag is particularly important for retro gaming because many older titles require precise timing, and any delay can affect gameplay performance.
Using the appropriate resolution scaling allows you to keep the image clear without introducing blurriness or pixelation, which is essential for pixel art games.
Adjusting brightness and contrast ensures that the visuals are true to the original design, allowing for an authentic gaming experience.
Finally, turning off noise reduction is recommended as it can create unwanted smoothing effects that detract from the distinct style of retro console graphics.
What Resolution Settings Should I Use for Various Retro Consoles?
The best resolution settings for retro consoles on an HD TV vary based on the specific console and the type of display technology used.
- NES (Nintendo Entertainment System): For the NES, set the resolution to 4:3 aspect ratio with a scale of 2x or 3x to maintain the original look of the graphics without stretching.
- SNES (Super Nintendo Entertainment System): Similar to the NES, using a 4:3 aspect ratio is ideal, and you can use a resolution of 256×224 scaled up by 4x for a cleaner image while preserving the retro aesthetic.
- Genesis (Sega Genesis): The Genesis benefits from a 4:3 aspect ratio as well, with a resolution of 320×240 scaled to 2x or 3x. This setting helps to keep the pixel art sharp and true to the original style.
- PlayStation 1: For the original PlayStation, a 4:3 aspect ratio is recommended, but you may also consider a 16:9 setting depending on how you want to stretch the image. Use a resolution of 640×480 scaled to 2x or 3x to enhance the graphics while avoiding blurriness.
- GameCube: The GameCube supports 480p output, so if your TV supports this resolution, use it for the best image quality. Otherwise, a 4:3 aspect ratio at 640×480 scaled to 2x or 3x will still yield good results.
- X68000 (Sharp X68000): This Japanese computer system is best displayed at 4:3 aspect ratio with a resolution of 640×480 scaled up. This configuration helps to reproduce its unique graphics accurately without distortion.
- Neo Geo: The Neo Geo has a native resolution of 320×224, so setting your TV to a 4:3 aspect ratio with a scale of 3x is ideal. This will preserve the game’s original graphics while ensuring a sharper display on modern screens.
Which Color Calibration Techniques Are Most Effective for Retrogaming?
The best color calibration techniques for retrogaming on HD TVs involve adjusting settings to enhance the visual output of older consoles.
- Manual Calibration: This technique involves adjusting the brightness, contrast, saturation, and hue settings directly on the TV.
- Use of Calibration Discs: Calibration discs provide test patterns and colors to help fine-tune your TV’s settings.
- Software Calibration Tools: Some software tools can be used with compatible devices to adjust color profiles and settings more precisely.
- Input Lag Reduction: Reducing input lag can enhance the gaming experience by making the picture quality feel more responsive.
- Utilizing Retro Game Filters: Many emulators and TVs come with filters that can replicate the look of older displays.
Manual Calibration: By manually adjusting the TV settings, users can optimize the picture quality for retro consoles. This includes tweaking brightness to ensure darker areas are visible, adjusting contrast for depth, and modifying saturation to enhance colors without distortion. Manual calibration allows for a personalized setup that can accommodate different lighting conditions in the viewing environment.
Use of Calibration Discs: Calibration discs like the Disney Wow or Spears & Munsil allow users to use standardized test patterns to adjust their TVs. These discs guide users through various settings such as white balance, gamma, and color accuracy, ensuring that the output closely matches the intended visuals of retro games. This method can help achieve a more authentic look and feel that older consoles were designed to deliver.
Software Calibration Tools: Software tools like CalMAN or DisplayCAL are equipped to analyze and adjust the display settings of compatible TVs. With the right hardware, these tools provide a detailed analysis of color accuracy and can create custom calibration profiles that enhance retro gaming visuals. This method is particularly effective for those seeking to achieve a high level of precision in their color reproduction.
Input Lag Reduction: Input lag can significantly affect gameplay, especially in fast-paced retro games. By using game mode settings or adjusting the picture processing settings on the TV, users can reduce the delay between their inputs and the on-screen response. This not only improves the gaming experience but can also make the colors and images appear more lively and immediate.
Utilizing Retro Game Filters: Emulators and some modern TVs offer filters that replicate the look of CRT monitors, which older consoles originally targeted. These filters can add scan lines, soften sharp edges, and provide a nostalgic aesthetic that enhances the retro gaming experience. By using these filters, players can evoke the classic feel of their favorite games while playing on modern HD displays.
What Types of Cables Are Essential for Enhancing Picture Quality for Retro Consoles?
To enhance picture quality for retro consoles on modern HD TVs, several types of cables are essential:
- Composite Cables: These cables combine video and audio signals into a single cable, often using yellow for video and red and white for audio. While they were standard for many older consoles, they can produce lower picture quality due to their limited bandwidth, resulting in softer images and more color bleeding.
- S-Video Cables: S-Video separates the brightness and color signals, allowing for a clearer image compared to composite cables. This type of connection significantly improves picture quality by reducing artifacts and improving color saturation, making it a preferred choice for many retro gamers.
- Component Cables: Component cables split the video signal into three separate channels (Y, Pb, Pr), which allows for higher resolutions and better color accuracy. This type of connection is ideal for consoles that support it, as it can deliver a much sharper and more vibrant image on HD TVs.
- HDMI Adapters: HDMI adapters convert the output from older consoles to HDMI, which is the standard input for modern TVs. These adapters can upscale the resolution, resulting in improved picture quality, but the effectiveness can vary based on the adapter’s quality and the console’s original output capabilities.
- Scart Cables: Commonly used in Europe, Scart cables can carry both audio and video signals and often provide a better quality image than composite. When paired with a Scart to HDMI converter, they can significantly enhance the visual experience on HD televisions.
- RGB Cables: RGB cables provide the best quality by carrying separate red, green, and blue signals, offering superior clarity and color reproduction. This option is often used with consoles that support RGB output, delivering a picture quality that is closer to what was originally intended by the developers.
Which HDMI Adapters Are Best for Connecting Retro Consoles to HD TVs?
| Adapter Name | Compatibility | Video Quality | Audio Output | User Reviews | Warranty | Price |
|---|---|---|---|---|---|---|
| RetroTINK 2X | Compatible with NES, SNES, Sega Genesis, N64, GameCube | Outputs 480p with low latency | Stereo audio output via HDMI | 4.8/5 – Excellent for picture quality | 1 year limited warranty | $100 – Premium option |
| AV to HDMI Converter | Works with various old consoles like Atari, Sega Master System | Upscales to 720p; decent quality | Analog audio output via RCA | 4.0/5 – Good for budget use | 90 days limited warranty | $25 – Budget-friendly |
| HDMI UpScaler | Compatible with all standard consoles, including PS1, PS2, Xbox | Outputs up to 1080p; good clarity | Digital audio output via HDMI | 4.5/5 – Great clarity and ease of use | 1 year limited warranty | $45 – Mid-range choice |
What Additional Hardware Options Can Significantly Improve Picture Quality for Retro Consoles?
To achieve the best picture for retro consoles on HD TVs, consider the following hardware options:
- HDMI Upscaler: A device that converts retro console output to HDMI, enhancing resolution and clarity.
- Component Video Cables: These cables provide superior video quality compared to composite cables, offering clearer images and better color reproduction.
- Scan Converter: This hardware converts the retro console’s signal to a format compatible with modern displays while preserving image quality and reducing lag.
- Retro Console Modifications: Mods such as adding HDMI output to consoles improve connectivity and picture quality by directly providing digital signals.
- High-Quality Display Settings: Adjusting the settings on both the console and TV can optimize picture quality, ensuring the best visual experience.
HDMI Upscaler: An HDMI upscaler takes the analog output from retro consoles and converts it to a digital HDMI signal, effectively increasing the resolution and making the image clearer on modern HD TVs. This device often includes options for scaling, filtering, and enhancing the colors, significantly improving the viewing experience for older games.
Component Video Cables: Using component video cables instead of traditional composite cables can dramatically enhance image quality. Component cables separate the video signal into multiple channels, resulting in sharper images and more vibrant colors, making them ideal for displaying retro games on HD TVs.
Scan Converter: Scan converters are designed to bridge the gap between retro consoles and modern televisions by converting the video signal to a compatible format while maintaining the original quality. They help eliminate artifacts and lag that can occur when playing older games on newer screens, ensuring a smoother gaming experience.
Retro Console Modifications: Modifying retro consoles to include HDMI output or other modern connections can greatly enhance picture quality. These modifications often involve installing new circuit boards or chips that provide a direct digital signal, which helps maintain the integrity of the original graphics and reduces the need for additional conversion hardware.
High-Quality Display Settings: Adjusting the display settings on both the retro console and the HD TV can significantly impact picture quality. Tweaking settings such as aspect ratio, sharpness, and color balance can optimize the visual output, allowing retro games to look their best on contemporary screens.
What Are the Common Picture Quality Issues Faced When Playing Retro Games on HD TVs and How Can I Solve Them?
| Issue | Description | Solution |
|---|---|---|
| Input Lag | High latency between controller input and screen response can hinder gameplay. | Enable game mode on the TV to reduce processing time. |
| Image Blurring | Retro games may appear blurry due to scaling on HD TVs. | Use a retro console with built-in upscaling or an external scaler. |
| Aspect Ratio Issues | Older games often have a 4:3 aspect ratio, causing stretching on widescreens. | Set the TV to maintain original aspect ratio or use letterboxing. |
| Color Distortion | Colors may appear washed out or overly saturated on modern displays. | Adjust the color settings manually or use an HDMI converter with color correction. |
| Screen Tearing | Visual disruptions where the image appears to tear during fast motion. | Enable V-Sync on compatible consoles or use a display with a higher refresh rate. |
| Input Resolution | The resolution mismatch between the retro console and modern TVs can lead to poor image quality. | Use a console that supports 720p output or higher, or an upscaler that can improve resolution. |
| Scan Lines | Scan lines from older games can be less visible on modern displays, affecting the retro aesthetic. | Use a CRT filter or shader on emulators to simulate the original display. |