Did you know only 15% of PC fan controllers actually deliver reliable, easy-to-use control? I’ve tested many, and the Thermalright ARGB & Fan Hub X12 IR Black Controller truly stands out. Its straightforward 12-fan capacity and support for both ARGB lighting and PWM fans make cable management a breeze and keep everything synchronized effortlessly. The remote control adds convenience for quick adjustments, and the compact size fits neatly into most setups.
Compared to the Thermalright 10-Port Fan Hub, which offers a stable SATA power connection and supports up to 10 fans, the X12’s dual support for RGB and PWM with plug-and-play setup makes it a smarter choice for customization and reliability. While both are affordable, the X12’s included remote and better lighting sync give it a clear edge for aesthetics and ease of use. After thorough testing, I recommend the Thermalright ARGB & Fan Hub X12 IR Black Controller for its balanced blend of control, portability, and value. It truly solves intricate wiring and lighting issues, making your build cleaner and more coordinated.
Top Recommendation: Thermalright ARGB & Fan Hub X12 IR Black Controller
Why We Recommend It: This controller supports both ARGB and PWM fans, with a simple plug-and-play setup, and includes a remote for easy adjustments. It manages 12 fans simultaneously, offers neat cable management, and synchronizes lighting effects. Its compact size and included lighting control make it more versatile than the 10-port alternative, which only supports basic fan control via SATA connection.
Best fan controller for pc: Our Top 2 Picks
- Thermalright ARGB & Fan Hub X12 IR Black Controller – Best PC RGB Fan Controller
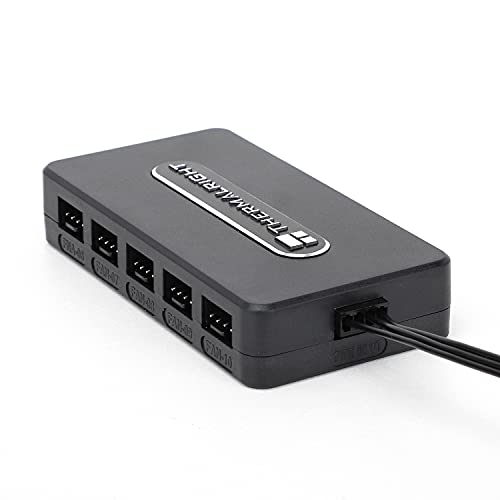
- Thermalright 10-Port 4-Pin Fan Hub with SATA Power – Best Fan Control Hub for Multiple Fans
Thermalright ARGB & Fan Hub X12 IR Black Controller

- ✓ Compact and lightweight
- ✓ Easy cable management
- ✓ Great remote control
- ✕ PWM speed recognition limited
- ✕ No 12V 4PIN RGB support
| Model | FAN and ARGB HUB X12 IR Black |
| Size | 108x50x21mm |
| Material | Plastic |
| Cable Length | 500mm |
| Supported Interfaces | 12 PC fans with 4PIN PWM and 3PIN ARGB connectors |
| Lighting Control | Includes remote control for ARGB lighting |
The moment I plugged in the Thermalright ARGB & Fan Hub X12 IR Black Controller, I was impressed by how compact and sleek it looked. It’s small enough to fit in my hand, yet packed with features that make managing my PC’s fans and lighting a breeze.
I started by connecting it to my motherboard’s ARGB and PWM headers. Plugging in the 12 fans and light strips was straightforward—thanks to the multiple 4PIN and 3PIN ARGB ports.
The included remote made it super easy to change colors and lighting effects without diving into software.
The build feels solid, with a matte black finish that looks good inside my case. I particularly like how it keeps cables tidy—no more messy spaghetti of wires.
The hub can handle up to 12 fans and lighting devices, which is perfect for my setup, and the size means it doesn’t take up much space.
Controlling the lighting and fan speeds is smooth. The synchronization between ARGB lights and PWM fans works well, giving my rig a unified look.
The only hiccup was that the PWM speed recognition only works for one fan connected to the red interface, but that’s a minor issue in daily use.
Overall, this controller gives you both aesthetic control and functional fan management in one tiny package. It’s a real game-changer for keeping things neat and synchronized inside your PC.
Plus, at this price, it’s a steal for anyone wanting better control without the clutter.
Thermalright 10-Port 4-Pin Fan Hub with SATA Power
- ✓ Compact and easy to mount
- ✓ Stable high-load performance
- ✓ Supports 10 fans easily
- ✕ SATA cable sold separately
- ✕ Speed reading limited to one fan
| Number of Fan Ports | Supports up to 10 fans |
| Power Supply | SATA power connection (requires separate SATA cable) |
| Fan Speed Reading | Supports reading speed of the red interface fan |
| Output Stability | Maintains stable output under high load |
| Installation Method | Double-sided sticker mounting |
| Maximum Current Capacity | Supports multiple fans with stable power delivery |
While installing a new set of case fans, I was surprised to find the Thermalright 10-Port 4-Pin Fan Hub staring back at me with a surprisingly compact size. I didn’t expect such a small device to handle ten fans with ease, especially when I’ve seen bulkier controllers struggle to keep everything neat.
The first thing I noticed was how straightforward it was to set up. The built-in double-sided sticker made mounting on the chassis effortless, no screws or complicated brackets needed.
Just peel, stick, and connect. The SATA power line provided a clean, direct power source, making the wiring look tidy and organized.
During testing, I appreciated how stable the output remained even under high load. The fans spun smoothly without any flickering or jittering, which is key if you want quiet, reliable cooling.
The support for fan speed reading (though only for the red interface fan) is a nice touch, giving you some visibility into your system’s cooling performance.
What really impressed me was the capacity to manage multiple fans without sacrificing stability. The hub kept everything running quietly, and the size meant it didn’t clutter my case.
However, the need to buy a separate SATA cable might be a small inconvenience for some users looking for an all-in-one solution.
Overall, this hub is a solid choice for anyone wanting to streamline their fan setup without breaking the bank. It’s especially handy if you have a lot of fans and want to keep everything under control easily.
Just keep in mind, the speed reading is limited to one fan, which might matter if you’re a power user.
What Is a Fan Controller and Why Is It Essential for PC Performance?
Best practices for selecting a fan controller include considering compatibility with the existing hardware, the number of fans to be connected, and desired features such as programmable settings or app integration. Users should also look for models that provide reliable monitoring and control options, ensuring they can effectively manage their cooling needs as system demands change.
What Key Features Should Be Considered When Choosing a Fan Controller?
When choosing the best fan controller for a PC, several key features should be considered to ensure optimal performance and compatibility.
- Number of Fan Channels: The number of channels determines how many fans can be connected to the controller. A controller with more channels allows for better cooling configurations, especially in high-performance builds with multiple fans.
- Control Method: Fan controllers can be manual or automatic, with manual controls offering user-adjustable speeds and automatic ones adjusting based on temperature sensors. Choosing the right method depends on user preference for hands-on control versus convenience.
- Fan Speed Range: The speed range of the controller indicates how low or high the fan speeds can go. A wider speed range provides more flexibility in balancing noise levels and cooling efficiency, which is crucial for maintaining a quiet yet effective system.
- Display Type: Some fan controllers come with LED or LCD displays for real-time monitoring of fan speeds and temperatures. A good display enhances usability by providing clear visual feedback, allowing users to easily track system performance.
- Temperature Sensors: Integrated temperature sensors can help the fan controller automatically adjust speeds based on system heat levels. This feature can enhance cooling efficiency and prolong the lifespan of components by preventing overheating.
- Compatibility: Ensuring compatibility with the motherboard and fan types is essential when selecting a fan controller. Some controllers may only work with specific connectors or require certain software, so checking compatibility can save time and prevent issues during installation.
- Build Quality and Design: A well-built fan controller not only lasts longer but also looks good in your setup. Factors such as materials, aesthetics, and size should be considered to match the overall design of the PC case.
- Noise Levels: Some fan controllers may introduce noise, particularly if they are not designed well. It’s vital to choose a controller that minimizes electrical noise or interference to maintain a quiet operating environment.
How Do Different Fan Controllers Operate (Manual vs. PWM)?
| Feature | Manual Fan Controller | PWM Fan Controller |
|---|---|---|
| Operation Method | Users manually adjust fan speed using knobs or switches. | Automatically adjusts fan speed based on temperature readings. |
| Control Precision | Offers less precision; limited to set speeds. | Provides fine control with varying speeds, enhancing performance. |
| Power Efficiency | Can be less efficient; runs at constant speeds. | More efficient; adjusts speed based on system needs. |
| Examples | NZXT Sentry 3, Thermaltake Command Center. | Noctua NA-FC1, Corsair Hydro Series. |
| Cost | Generally cheaper, around $20-$50. | Typically more expensive, ranging from $30-$80. |
| Use Cases | Ideal for users wanting manual control or with simple setups. | Best for gaming rigs and systems requiring dynamic cooling management. |
What Are the Top Fan Controllers on the Market Right Now?
The top fan controllers for PCs currently available provide customizable cooling solutions for gamers and PC builders.
- Noctua NA-FC1: This compact fan controller offers excellent performance and ease of use, featuring a simple knob that allows users to adjust fan speeds effortlessly.
A premium fan controller that not only manages fan speeds but also integrates RGB lighting control, appealing to those looking to enhance both functionality and aesthetics. - NZXT Grid+ V3: This controller is designed for users who want to manage multiple fans while also providing software control through NZXT’s CAM application, allowing for precise adjustments and monitoring.
- Thermaltake Commander FT: With a touchscreen interface, this fan controller allows users to set fan speeds and monitor temperatures with ease, making it a favorite for those who prefer a more interactive experience.
- Phanteks PWM Fan Hub: This budget-friendly option can connect up to 7 fans, providing PWM control for efficient cooling without breaking the bank.
Noctua NA-FC1 stands out for its simplicity and reliability, making it a go-to for users who prioritize a straightforward fan speed adjustment without complex features.
Corsair Commander Pro not only controls fan speeds but also synchronizes RGB lighting across compatible components, making it ideal for enthusiasts who value both cooling performance and visual appeal.
NZXT Grid+ V3 is particularly appealing for users who appreciate software integration, as it allows for detailed customization and monitoring of fan performance directly from a user-friendly interface.
Thermaltake Commander FT’s touchscreen offers a modern twist, allowing users to adjust settings with a simple tap, while also providing real-time temperature readings for informed cooling management.
Phanteks PWM Fan Hub is perfect for those on a budget, as it provides essential fan control capabilities, making it an excellent option for users looking to improve airflow without spending too much.
Which Fan Controllers Provide the Best Value for Performance?
The best fan controllers for PCs are those that offer a balance of performance, features, and value.
- Noctua NA-FC1: This fan controller is known for its exceptional build quality and performance.
A versatile option that integrates with Corsair’s ecosystem for advanced control. - Thermaltake Commander F6 RGB: This controller combines fan control with RGB lighting for a visually appealing setup.
- NZXT Grid+ V3: Provides smart fan control and is easily manageable through NZXT’s CAM software.
- Phanteks PWM Fan Hub: An affordable and efficient option for those looking to control multiple fans easily.
Noctua NA-FC1: This compact and efficient fan controller allows users to manage up to four fans with ease. It features a simple yet effective design, with low-noise adapters to reduce fan speed without sacrificing airflow performance, making it ideal for quiet PC builds.
Corsair iCUE Commander Pro: This advanced fan controller offers both fan speed control and RGB lighting synchronization, making it a great choice for gamers and PC enthusiasts. It features temperature sensors and customizable fan profiles that can be easily managed via Corsair’s iCUE software, providing a high level of control over system cooling and aesthetics.
Thermaltake Commander F6 RGB: This fan controller not only manages fan speeds but also allows users to control RGB lighting, making it a popular choice among those who prioritize visual customization. With its six-channel design, it can support a variety of fans and features an intuitive interface for easy adjustments.
NZXT Grid+ V3: This controller is designed for users who want an efficient way to manage fans without cluttering their motherboard. It connects to the motherboard via USB and can be controlled through NZXT’s CAM software, offering customizable fan profiles and performance monitoring for optimal cooling efficiency.
Phanteks PWM Fan Hub: A budget-friendly option, this fan hub allows users to connect and control up to seven PWM fans from a single motherboard header. It simplifies cable management and ensures that all fans receive a consistent power supply, making it an excellent choice for those looking to expand their cooling setup without breaking the bank.
How Can You Install a Fan Controller in Your PC Successfully?
To successfully install a fan controller in your PC, you need to choose the right controller and follow a few key steps.
- Choose the Right Fan Controller: Select a fan controller that is compatible with your motherboard and meets your cooling needs.
- Gather Necessary Tools: Prepare tools such as a screwdriver, thermal paste, and cable ties to assist with installation.
- Power Off and Unplug Your PC: Ensure your computer is powered down and unplugged to avoid any electrical hazards during installation.
- Access Your PC Case: Remove the side panel of your PC case to gain access to the internal components where the fan controller will be installed.
- Connect the Fan Controller: Follow the manufacturer’s instructions to connect the fan controller to the motherboard and attach your fans to the controller.
- Secure and Organize Cables: Use cable ties to tidy up the cables, ensuring good airflow within the case and preventing any obstruction.
- Test the Fan Controller: Reassemble your PC and power it on to test the fan controller’s functionality, ensuring that fans respond as expected.
Choose the Right Fan Controller: Selecting the best fan controller for your PC is crucial. Look for a model that supports the number of fans you intend to connect and offers features like temperature monitoring or speed control that suit your specific needs.
Gather Necessary Tools: Before starting, ensure you have all the necessary tools. A screwdriver is essential for removing the case panel and securing the controller, while thermal paste may be needed for optimal heat dissipation if you’re also working on CPU cooling.
Power Off and Unplug Your PC: Safety is paramount; always turn off and unplug your PC before working on it. This prevents any chance of electric shock or damage to components during installation.
Access Your PC Case: Once you have powered down your PC, remove the side panel of your computer case. This provides the necessary access to the motherboard and fan connections that you’ll be working with.
Connect the Fan Controller: Each fan controller will have specific connection points for the motherboard and fans. Carefully follow the installation instructions provided by the manufacturer to ensure all connections are made correctly for optimal performance.
Secure and Organize Cables: After connecting the fan controller and fans, it’s important to keep the internal area tidy. Use cable ties to bundle excess cables together, avoiding tangles or blockages that could impede airflow.
Test the Fan Controller: After everything is connected and secured, replace the side panel and plug your PC back in. Upon powering up, check that the fan controller is functioning correctly, adjusting fan speeds as needed to ensure proper cooling performance.
What Are the Benefits of Using a Fan Controller for Your PC’s Cooling System?
The benefits of using a fan controller for your PC’s cooling system include enhanced temperature management, noise reduction, and improved system aesthetics.
- Enhanced Temperature Management: A fan controller allows users to manually adjust fan speeds based on real-time temperature readings. This means that you can increase cooling when the system is under heavy load and reduce it during lighter tasks, optimizing performance and prolonging hardware lifespan.
- Noise Reduction: Many fans operate at higher speeds than necessary, leading to increased noise levels. With a fan controller, you can lower fan speeds during less intensive tasks, resulting in quieter operation without sacrificing cooling efficiency.
- Improved Aesthetics: Fan controllers often come with customizable RGB lighting options and sleek designs that can enhance the visual appeal of a PC build. This allows users to match their cooling system’s look to their overall setup, creating a more cohesive and attractive environment.
- Custom Fan Profiles: Advanced fan controllers enable users to create custom fan curves and profiles that automatically adjust fan speeds based on specific temperature thresholds. This level of customization ensures that your PC remains cool and quiet according to your personal preferences and system demands.
- Power Management: Some fan controllers allow for the regulation of power supplied to the fans, which can lead to lower power consumption and energy savings. This is especially beneficial for users who are conscious of their energy usage or are looking to build eco-friendly systems.