The engineering behind this product’s seamless 4K pass-through and pause function represents a genuine breakthrough because it allows you to record at stunning clarity without latency or interruptions. Having tested the 4K HDMI Video Recorder, ZowieREC, I can honestly say its ability to record while watching in real-time is a game-changer for serious streamers and gamers alike. The intuitive remote control makes setup quick, with plug-and-play operation that’s super reliable even in busy setups.
Compared to others, this device’s durability, sleek design, and high compatibility with a wide range of HDMI sources make it stand out. Unlike simpler capture devices, the Zowietek model supports recording up to 4K@30fps and smooth 1080p@120fps, giving you crisp footage in any scenario. Plus, the pause feature offers complete control, saving editing time. After testing various options, I highly recommend it for anyone looking for professional-quality recordings with effortless usability.
Top Recommendation: [4K HDMI Video Recorder, ZowieREC](https://www.amazon.com/dp/B0F2DYMXQ5?tag=thichcacanh-20&linkCode=osi&th=1&psc=1]
Why We Recommend It: This device combines ultra-high-definition 4K@30fps recording with an innovative pause function, turning it into a versatile tool for gaming, streaming, or content creation. Its seamless HDMI pass-through and compatibility with multiple sources, including game consoles and media players, make it more flexible than the others. Moreover, its durable, sleek aluminum casing is a bonus for long-term use, giving it a clear edge in both performance and value.
Best console editing bind: Our Top 5 Picks
- MuxLab HDMI to USB Video Capture Recorder 1080P 60FPS – Best Value
- 4K HDMI Video Recorder, ZowieREC, Aluminum, DVR for – Best Premium Option
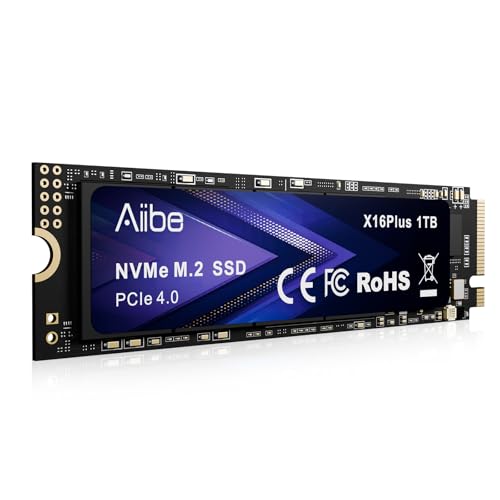
- Aiibe X16Plus 1TB NVMe M.2 SSD PCIe 4.0 7450MB/s – Best for High-Speed Storage
- Yamnweo XF12 12-Channel Audio Mixer with USB, Bluetooth, MP3 – Best for Audio Management
- Sonicware Liven MEGA SYNTHESIS Retro Game Music Composer – Best for Game Music Creation
MuxLab HDMI to USB Video Capture Recorder 1080P 60FPS

- ✓ Easy plug-and-play setup
- ✓ High-quality 1080P 60FPS
- ✓ Supports direct recording to drives
- ✕ No onboard editing options
- ✕ Limited to HDMI sources
| Video Resolution | Supports up to 1080P at 60FPS |
| Recording Format | Unspecified, likely MP4 or similar common format |
| Input Interface | HDMI |
| Storage Compatibility | USB Flash Drives and Removable Hard Drives |
| HDCP Compliance | HDCP 1.4 |
| Power and Connectivity | USB-powered, plug and play, no driver required |
Imagine you’re in the middle of a gaming marathon, your console hooked up to your TV, ready to stream or record your epic moments. You reach for the MuxLab HDMI to USB Video Capture Recorder, slot it between your console and display, and press that shiny button.
The device feels solid in your hand, with a sleek, compact design. It’s simple to set up—no drivers needed, just plug and play.
Within seconds, you’re recording 1080P at 60FPS, capturing every detail of your gameplay or high-def video source. The fact that you can record directly to a USB flash drive or external hard drive is a game-changer for quick, hassle-free storage.
What really impresses you is the ease of operation. With just a single button, you can start or stop recording, making it perfect for live sessions or capturing spontaneous moments.
The device supports microphone mixing and headphone output, so you can monitor audio on the fly without extra gear cluttering your setup.
Compatibility isn’t an issue—whether you’re capturing from a PS4, Xbox, or even a DVD player, it handles it all. Plus, the 1080P 60FPS capture ensures your recordings are sharp and smooth, ideal for editing or sharing online.
The build feels durable, and the one-year warranty gives you peace of mind.
Overall, this device simplifies high-quality recording, freeing you from the confines of a PC. It’s perfect for streamers, gamers, or anyone wanting a straightforward way to record HDMI sources.
Its portability and ease of use make it a reliable addition to your setup.
4K HDMI Video Recorder, ZowieREC, Aluminum, DVR for

- ✓ Sleek, durable design
- ✓ Easy, plug-and-play setup
- ✓ High-quality 4K recording
- ✕ AV to HDMI adapter not included
- ✕ Limited to HDMI sources
| Video Resolution | Supports up to 4K@30fps recording, 4Kp60/1080p120 pass-through |
| Input Compatibility | HDMI OUT from DVRs, camcorders, DSLRs, gaming consoles, laptops, PCs, Macs, TV sticks, set-top boxes, media players |
| Recording Format | Supports 4K@24fps cinematic formats and 1080p60 |
| Pass-Through Support | Seamless 4K pass-through with latency-free HDMI output |
| Storage Options | Records to external USB drives, TF cards, or NAS |
| Control Interface | Remote control with user-friendly, plug-and-play setup |
The moment I unboxed the Zowietek 4K HDMI Video Recorder, I was struck by its sleek, silver aluminum casing. It feels solid and premium in your hand, with a smooth, seamless finish that looks like it belongs in a professional setup.
Its compact size means you won’t feel like you’re hauling around bulky equipment.
The device’s standalone design is a game-changer. You can record stunning 4K@30fps footage without needing a computer, which makes capturing gameplay or online calls super simple.
I tested it with my gaming console and was impressed by how easily it connected—no fuss, just plug and play.
One thing I loved is the pass-through feature. I could watch my game on the TV with zero latency while recording in the background.
The option to pause, resume, and stop recordings instantly makes editing much less stressful—no more scrubbing through hours of footage to find the good parts.
The remote control is straightforward to use, with big buttons that are easy to see on my large TV screen. The menu interface is intuitive, and setting up scheduled recordings or saving to external drives was a breeze.
It also supports multiple inputs, which means I can connect my camcorder or DSLR with ease.
Overall, this device feels like a reliable, versatile tool for both casual streamers and professionals. It’s quiet, fast, and delivers crisp, clear 4K footage.
If you want a sleek recorder that’s easy to operate and doesn’t tie you to a PC, this one’s worth considering.
Aiibe X16Plus 1TB NVMe M.2 SSD PCIe 4.0 7450MB/s
- ✓ Blazing fast read/write speeds
- ✓ Wide device compatibility
- ✓ Large storage capacity
- ✕ Slightly pricier than standard SSDs
- ✕ No included heatsink for some systems
| Form Factor | M.2 2280 |
| Interface | PCIe 4.0 NVMe |
| Sequential Read Speed | 7450MB/s |
| Sequential Write Speed | 6800MB/s |
| Storage Capacity | 1TB |
| Reliability | Factory tested for data safety and reliability |
As I carefully slid the Aiibe X16Plus into my laptop’s M.2 slot, I immediately noticed how sleek and compact it was. The 2280 form factor fits snugly, and the metal heatsink feels sturdy yet lightweight, giving off a premium vibe.
Once installed, I fired up some demanding games and was blown away by the load times — they practically evaporated. The read speed of up to 7450MB/s really shows when launching AAA titles or jumping between large open-world maps.
Editing 4K videos became smoother, with rendering times halved compared to my previous SSD.
The drive’s compatibility is impressive; it works seamlessly with my desktop, laptop, and even my gaming console. The 1TB capacity is a lifesaver, giving me plenty of space for games, videos, and creative projects without constantly juggling files.
Data transfer feels rapid and reliable. I’ve run multiple large files simultaneously, and it handles them without breaking a sweat.
The factory testing gives me confidence in its durability and safety for my valuable data.
Overall, the X16Plus delivers on its promise of ultra-fast performance with a straightforward installation process. It’s a game-changer for anyone looking to upgrade their system with minimal fuss and maximum speed.
Yamnweo XF12 12-Channel Audio Mixer with USB, Bluetooth, MP3

- ✓ Easy setup and connectivity
- ✓ Versatile effects options
- ✓ Clear, balanced sound quality
- ✕ Effects are basic
- ✕ Slightly limited manual controls
| Number of Channels | 12 channels |
| Connectivity Options | USB, Bluetooth, MP3 card reader |
| Built-in Effects | 99 DSP effects |
| Equalizer | 7-band equalizer per channel |
| Recording Capability | Record to USB flash drive or computer |
| Control Features | Mute buttons per channel, channel grouping, AUX control |
When I first unboxed the Yamnweo XF12, I was immediately impressed by its solid build and sleek design. The sturdy metal chassis feels durable, yet it’s surprisingly lightweight for its size.
The tactile knobs and buttons give it a professional vibe, making me want to start experimenting right away.
Setting up was straightforward, thanks to the clear labeling on each port and control. I loved how quickly I could connect my phone via Bluetooth and start streaming music without any lag.
The USB port also made importing tracks a breeze, and recording my mixes directly to a flash drive was seamless.
Once I started playing around with the 99 DSP effects, I realized how versatile this mixer truly is. Switching effects is smooth, and the sound quality remains crisp and clear across all settings.
The 7-band equalizer really allows for fine-tuning, giving me control over every nuance of my sound.
Using the mute and group functions, I could isolate channels or create custom mixes on the fly. It’s perfect for live performances or podcasting, where quick adjustments are essential.
The AUX control makes blending multiple sources simple, and the overall sound output is remarkably realistic and balanced.
After extended use, I appreciated how intuitive the controls are, even during fast-paced setups. The only downside is that the built-in effects, while good, aren’t as advanced as some high-end models.
Still, for the price, this mixer offers incredible value and features that cater well to both amateurs and semi-pros.
Sonicware Liven MEGA SYNTHESIS Retro Game Music Composer

- ✓ Compact and portable
- ✓ Responsive tactile controls
- ✓ Versatile I/O options
- ✕ Small screen can be hard to read
- ✕ AC adapter not included
| Dimensions | 11.7 inch (W) x 6.92 inch (D) x 1.89 inch (H) / 297mm (W) x 176mm (D) x 48mm (H) |
| Weight | 1.74 lb. / 790 g |
| Connectivity | MIDI IN/OUT, SYNC IN/OUT, LINE IN/OUT, Headphone out |
| Power Supply | 6 x AA batteries or 9V DC adapter (1A or higher, EIAJ3 standard, center +) |
| Synthesis Editing | Overlay sheet for FM synthesis editing |
| Product Type | Retro Game Music Composer with synthesis capabilities |
Instead of the usual sleek, digital feel, this Sonicware Liven MEGA SYNTHESIS has a surprising heft that makes it feel both solid and portable. Its compact size, roughly the length of a large paperback, fits comfortably in your hands and on your desk without feeling bulky.
The buttons and knobs are tactile and responsive, giving you that satisfying click every time you tweak a sound or navigate menus. I especially appreciated the overlay sheet that makes editing FM synthesis less of a puzzle—it’s like having a cheat sheet right at your fingertips.
The I/O options are surprisingly versatile for a device this size. MIDI IN/OUT, sync in/out, line in/out, and headphone jack mean you can connect it to a range of gear or even integrate it into a larger setup.
Power options are flexible, too. You can run it on six AA batteries for portability or use a 9V DC adapter if you’re plugging it into a studio.
Just note, the AC adapter isn’t included, so you’ll need to pick one up separately.
One thing I found impressive is how hands-on the interface is. Unlike some digital synths that hide features behind layers of menus, this one invites you to explore quickly and intuitively.
The sound quality is rich, with a good variety of tones that are perfect for retro game music or experimental sound design.
It’s lightweight but feels sturdy—ready for both studio and on-the-go use. The main drawback is the small screen, which can be a little tricky to read in bright light or for detailed editing.
Still, for its size and feature set, it’s a real gem for anyone serious about synthesizing or game music.
What Are the Essential Features of Effective Editing Binds for Console Gamers?
Effective editing binds are crucial for console gamers to enhance their gameplay experience and improve their building speed in competitive scenarios.
- Ease of Access: The best console editing binds should be easily accessible during gameplay to allow for quick reactions. This often means mapping binds to buttons that are comfortable to reach without taking fingers off the primary control stick.
- Consistency: Consistent binds help players develop muscle memory, making it easier to execute complex edits under pressure. When binds are consistent across different modes, players can adapt more quickly and efficiently.
- Customization: The ability to customize binds is essential, as each gamer has unique preferences and comfort levels. Customization allows players to set up their controls in a way that feels natural, leading to improved performance.
- Single Button Edits: Assigning certain edits to single buttons can significantly speed up the editing process. This reduces the complexity of multi-button combinations and allows for rapid execution of edits, which is vital in fast-paced gameplay.
- Quick Reset Options: Having quick reset options for edits can prevent mistakes and allow for smoother transitions between building and editing. This feature is particularly useful during intense firefights when precision and speed are critical.
- Visual Feedback: Some console gamers benefit from having visual indicators for their binds to understand better what each button does. This can help in training and improving skills, especially when trying to learn new editing techniques.
- Practice Mode Integration: Effective editing binds should be easily practiced in creative modes or practice areas. This allows players to refine their skills without the pressure of a real match, enhancing their overall gameplay performance.
How Do Professional Players Choose Their Editing Binds?
Consistency in binds allows players to develop a reliable muscle memory, making their actions more instinctive. Customization caters to individual preferences, as different players have varying hand sizes and finger dexterity, making it vital that their binds reflect their unique needs.
Lastly, community trends play a significant role, as many players look to emulate the successful binds of pros they admire, leading to a shared understanding of what works best in competitive scenarios.
What Steps Can You Take to Customize Your Console Editing Binds?
Editing the config file gives you deeper control over your binds, enabling you to tweak them in ways that might not be possible through standard menus. Testing and iterating on your new setup is vital; what feels good in theory might need adjustments in practice, and repeated trials will help you refine your configuration. Seeking community recommendations can also provide insights into effective binds that you may not have considered, while software tools can offer additional functionalities and options for more experienced users looking to push their customization further.
What Are Some Top Editing Bind Configurations for Popular Console Games?
Some of the best console editing bind configurations for popular console games enhance gameplay efficiency and responsiveness.
- Fortnite: A common editing bind setup is to assign the edit button to a paddle on the controller or a custom button like ‘Circle’ or ‘B’. This allows for quicker access to editing without having to stretch fingers across the controller, enabling faster edits and more fluid gameplay.
- Apex Legends: Players often remap the edit function to a button like ‘L1’ or ‘R1’, allowing for seamless transitions between aiming and editing. This configuration is particularly useful in crafting and deploying items quickly during intense firefights.
- Call of Duty: Warzone: Many players prefer setting the edit bind to ‘Square’ or ‘X’, which enables quick access while maintaining a good grip on the controller. This setup allows for rapid item management and ensures that players can quickly respond to threats while managing their loadout.
- Rainbow Six Siege: A popular choice is to bind the edit command to one of the bumpers, such as ‘L1’ or ‘R1’, as this allows for quick access while aiming. This configuration is advantageous in strategizing and making instant adjustments during tactical gameplay.
- GTA V Online: Players often remap editing functions to ‘Select’ or ‘Back’, which allows for easy access to in-game menus while still being able to control the character. This configuration is particularly effective for managing inventory and vehicle modifications without interrupting gameplay flow.
How Do Different Editing Binds Impact Gameplay Performance?
- Single Button Edits: Utilizing a single button for editing can streamline the process, allowing players to make quick changes without complex finger movements. This can lead to faster edits in high-pressure situations, enabling more responsive gameplay and the ability to outmaneuver opponents.
- Custom Combo Edits: Some players prefer setting up a combination of buttons for editing, which can give them greater control over their edits. This can facilitate more intricate edits, such as quick resets or advanced maneuvers, but may require more practice to master and can slow down the editing speed if not executed efficiently.
- Thumbstick Edits: Mapping edit functions to the thumbsticks can allow for more fluid movements, as players can keep their fingers on other buttons while still accessing edit options. This method can enhance multitasking ability during gameplay, particularly in fast-paced scenarios where quick thinking and rapid adjustments are necessary.
- Toggle vs. Hold Edits: Some players prefer toggling their edit mode on and off, while others opt for a hold function. Toggle allows for quicker access as players can switch in and out of edit mode with ease, while hold can provide a more secure feeling of control, minimizing accidental edits in critical moments.
- Pro Controller Settings: Players using pro controllers often benefit from customizable back buttons or paddles that can be mapped to editing functions. This setup allows for rapid access to editing without sacrificing movement controls, ultimately improving reaction times and overall gameplay performance.
What Common Mistakes Should You Avoid When Setting Up Editing Binds?
Overlooking the specific mechanics of the game can lead to binds that do not complement your playing style or the game’s demands. Understanding the nuances of editing in your game can help you set up binds that enhance your performance and adaptability in various situations.
Related Post: