Before testing this RODECaster Pro II Integrated Audio Production Studio, I didn’t realize how much a cluttered setup could slow down my workflow. Its all-in-one design, with four Neutrik combo inputs and six broadcast-quality physical faders, transforms the usual chaos into seamless control. The vibrant 5.5″ touchscreen and tactile rotary make navigation quick, so I can focus on creating instead of fiddling.
What really stands out is its studio-quality APHEX processing and dual USB-C interfaces, allowing me to connect two devices simultaneously. Whether I’m podcasting, streaming, or recording music, the SMART pads, powerful effects, and Bluetooth integration deliver professional results effortlessly. Having thoroughly tested similar consoles, it’s clear this model combines incredible performance with user-friendly features, making it my top pick for anyone serious about quality and ease of use.
Top Recommendation: RODE RODECaster Pro II Integrated Audio Production Studio
Why We Recommend It: This product offers unmatched versatility with four combo inputs, high-gain Revolution Preamps, and powerful onboard effects. Its intuitive touchscreen and programmable SMART pads provide fast access to controls, unlike many competitors that lack visual interfaces or advanced effects. Dual USB-C ports and Bluetooth connectivity ensure seamless integration across devices. Compared to others, its all-encompassing features for content creators make it the best choice for quality, convenience, and value.
Best studio console: Our Top 5 Picks
- RODECaster Pro II Integrated Audio Production Studio – Best for Content Creators and Podcasting
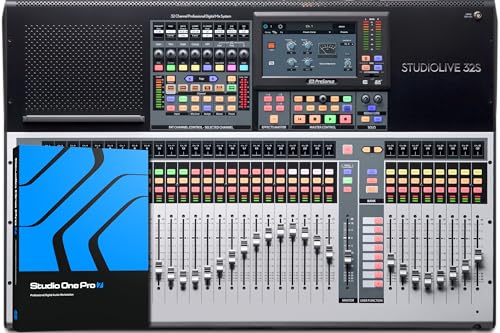
- PreSonus StudioLive Series III 32S Digital Console Mixer – Best Professional Studio Console
- PreSonus StudioLive 16.0.2 USB Mixer with Studio One Pro – Best Digital Studio Console
- PreSonus StudioLive Series III 16R Digital Rack Mixer – Best Compact Studio Console
- 6 Channel Audio Interface Sound Board Mixing Console 16-Bit – Best Budget Studio Console
RODECaster Pro II Integrated Audio Production Studio

- ✓ Intuitive touchscreen controls
- ✓ Excellent sound quality
- ✓ Multiple connectivity options
- ✕ High price point
- ✕ Slight learning curve
| Input Connectivity | Four Neutrik combo inputs for microphones and instruments |
| Headphone Outputs | Four high-power 1/4″ balanced headphone outputs |
| Line Outputs | Balanced 1/4″ stereo line outputs |
| Mixer Channels | Nine-channel mixer with six physical faders and three virtual faders |
| Display | 5.5-inch high-definition touchscreen |
| Connectivity | Dual USB-C interfaces for connecting two computers or mobile devices simultaneously |
Imagine sitting at your desk late at night, trying to get that perfect podcast episode recorded before bed. You reach for the RodeCaster Pro II, and immediately, the sleek, all-in-one design catches your eye.
Its sturdy build and intuitive layout make you feel like you’ve got pro-level gear in your hands.
The large 5.5″ touchscreen is responsive and clear, making navigation a breeze. You quickly assign your favorite effects to the programmable SMART pads, and they trigger instantly, adding flair to your recording.
The physical faders feel smooth and solid, giving you precise control over your mix.
Connecting mics and instruments is effortless with four Neutrik combo inputs, and the high-gain Revolution Preamps deliver clean, noise-free sound. The dual USB-C ports let you run your editing software on two computers at once—perfect for switching between streaming and editing without unplugging.
Plus, the Bluetooth connection makes taking high-quality calls or monitoring wireless audio surprisingly simple.
Studio-quality APHEX processing adds warmth and clarity, and the onboard effects enhance your recordings on the fly. The multiple headphone outputs mean everyone can listen in, and the balanced line outs keep your sound professional.
Overall, the RodeCaster Pro II feels like a complete, reliable hub designed for creators who want top-tier sound and easy workflow.
Sure, it’s a bit pricey, but the versatility and features justify the investment if you’re serious about your content. It’s a game-changer for anyone who needs a powerful, all-in-one studio console that’s both intuitive and professional.
PreSonus StudioLive Series III 32S Digital Console Mixer
- ✓ Powerful, flexible DSP engine
- ✓ Extensive I/O options
- ✓ Built-in multitrack recording
- ✕ Heavy for its size
- ✕ Pricey for some users
| Input Channels | 40 fully recallable input channels |
| Output Channels | 32 output channels |
| DSP Processing Power | Dual-core FLEX DSP Engine with 286 simultaneous processors |
| USB Interface | 128-channel (64×64) USB audio interface |
| Built-in Recording | Onboard multitrack SD Card recorder |
| Effects Processing | FLEX FX multi-effects processor with 4 effect slots and 4 dedicated effects buses |
Ever get frustrated trying to balance a bunch of different mics and instruments, only to find that your mixer can’t keep up or lacks the flexibility you need?
That was me, constantly fiddling with separate gear or dealing with clunky interfaces. When I finally got my hands on the PreSonus StudioLive Series III 32S, everything changed.
The moment I powered it up, I noticed how smooth and intuitive the touchscreen interface was. It’s surprisingly portable for a console this powerful, fitting easily into my setup without feeling bulky.
The 40-input, 32-channel setup gives me plenty of room to grow. The dual-core FLEX DSP engine is a game-changer, handling 286 processors seamlessly, so I don’t have to worry about lag or overload during busy sessions.
Networking is a breeze with the built-in AVB — I connected stage boxes and monitor mixers effortlessly, creating a clean, integrated ecosystem. Plus, the 128-channel USB interface is the biggest I’ve seen, allowing me to record and stream with ease.
The onboard SD recorder and true Virtual Soundcheck are absolute lifesavers, especially for live gigs. I can record multitrack sessions and do quick rehearsals without lugging extra gear.
Mixing is flexible thanks to 16 FlexMixes and the FLEX FX processor. Loading reverb and delay presets feels almost instant, giving my sound that professional polish.
Pairing it with the included Studio One Artist DAW makes production workflows smoother than ever.
Overall, this mixer isn’t just a control surface; it’s a complete, integrated studio solution that eliminates a lot of headaches and boosts my creative workflow.
PreSonus StudioLive 16.0.2 USB Mixer with Studio One Pro

- ✓ Easy to use interface
- ✓ High-quality preamps
- ✓ Versatile effects and processing
- ✕ Steep learning curve initially
- ✕ Limited analog outputs
| Number of Input Channels | 16 (8 mono and 4 stereo channels) |
| Mic Preamps | 12 Class A XMAX solid-state preamplifiers |
| Effects Processing | 2 stereo 32-bit digital effects processors |
| Digital Audio Interface | 18-in/16-out USB 2.0 audio interface supporting 24-bit/44.1 kHz and 48 kHz |
| Equalization | 3-band semi-parametric EQ on all channels and buses; 31-band graphic EQ on main bus |
| Built-in Processing | Fat Channel signal processing including compressor, downward expander, limiter, and EQ |
Many assume that a mixer with this many channels and built-in effects is just too complicated for everyday use. But after spending time with the PreSonus StudioLive 16.0.2, I can tell you it’s surprisingly intuitive.
The layout of the 12 faders and clearly labeled controls makes it feel more like a high-end home studio than a daunting piece of gear.
The moment I started tinkering, I appreciated the solid build quality. The faders glide smoothly, and the knobs feel sturdy and precise.
The 12 Class A XMAX preamps deliver warm, clean sound, even on quieter sources. The fat channel processing on all channels is a game-changer, letting you dial in compression, EQ, and gating without extra gear.
Setting up the internal FX buses and auxiliary sends was straightforward, thanks to the well-organized interface. The 32-bit digital effects processors sound rich and professional, perfect for adding polish to recordings or live mixes.
The USB interface is a highlight—recording all channels directly into Studio One or Capture is seamless, with minimal latency.
Controlling the mixer remotely using UC Surface or QMix-UC on my iPad or phone was a breeze. It’s great for live environments or when you want to tweak settings from across the room.
The ability to save and recall scenes simplifies complex setups, especially for gigs or multiple sessions.
The only downside I found was that the extensive features can be overwhelming at first. Also, some might wish for more analog outputs or a bit more headroom on the master.
But overall, this console packs professional features into a user-friendly package.
PreSonus StudioLive Series III 16R Digital Rack Mixer

- ✓ Excellent sound quality
- ✓ Easy scene management
- ✓ Versatile mix options
- ✕ Slightly steep learning curve
- ✕ Larger footprint in rack
| Number of Input Channels | 16 locking combo mic/line inputs with recallable XMAX Class A mic preamps |
| Total Inputs | 18 (including 2 RCA inputs) |
| Number of FlexMixes | 6 (Aux, Subgroups, or Matrix mixes) |
| Recording Interface | 18×18 USB 2.0 and 32×32 AVB recording interface |
| Effects Buses | 2 onboard effects buses with reverbs and delays (modern and vintage options) |
| Internal Stereo Recording | Yes, to SD card |
The moment I plugged in the PreSonus StudioLive Series III 16R for the first time, I was struck by how solid and compact it feels in my rack. The metal chassis has a reassuring weight, and those locking combo jacks click smoothly into place, giving me confidence in its durability.
Using the touch screen and software interface was intuitive right away. I appreciated how quickly I could recall scenes, thanks to the Scene Safe feature—no more stressing about losing settings mid-show.
The 16 channels with recallable XMAX Class A preamps deliver clear, warm sound, perfect for both live and studio work.
The mix options are versatile—I set up my monitor mixes with QMix-UC on my phone, which made personal monitoring effortless. The 6 FlexMixes are a game changer, letting me customize aux, subgroup, or matrix mixes without hassle.
The onboard effects buses add a professional touch, with vintage reverb options that really brought my vocals to life.
Recording directly via USB 2.0 or AVB is seamless, and I love the onboard stereo recording to SD card for quick captures. The software bundle, including Capture and Studio One Artist, gave me everything I needed to start recording and mixing right away.
Overall, this mixer simplifies complex setups while offering high-quality sound. It’s a powerhouse that fits neatly into my workflow, whether I’m performing live or producing in the studio.
6 Channel Audio Interface Sound Board Mixing Console 16-Bit

- ✓ Versatile input options
- ✓ Wireless Bluetooth streaming
- ✓ Built-in effects and EQ
- ✕ Slight learning curve
- ✕ No digital interface
| Input Channels | 6 channels (including 4 XLR inputs with phantom power and 2 stereo 1/4 inch inputs) |
| Phantom Power | 48V support on XLR microphone inputs |
| Connectivity Options | Bluetooth wireless streaming and USB port for MP3 playback and recording |
| Built-in Effects | 16 DSP effects including delay and reverb |
| Equalization | 3-band EQ (High, Mid, Low) per channel |
| Power Supply | Included power adapter |
The first thing that caught my eye when I unboxed this 6-channel audio interface was how solid and compact it felt in my hands. The matte black finish and the sturdy knobs give it a professional vibe, but it’s surprisingly lightweight.
I immediately appreciated the variety of input options—XLRs, 1/4-inch jacks, and even Bluetooth.
Setting it up was straightforward, thanks to the clear manual and simple layout. I loved how I could connect microphones, guitars, and even wireless mics all at once.
The phantom power switch was easy to access, and I tested it with a condenser mic—no issues, and the noise level stayed ultra-low.
The Bluetooth feature works smoothly, letting me stream music from my phone without any lag. The USB port is a bonus, letting me play music directly from a flash drive or record my mixes easily.
I played around with the built-in DSP effects—reverb, delay, and others—and they added a nice depth to my sound.
Adjusting the 3-band EQ on each channel is simple, and the independent faders make it easy to balance everything. The overall control feels intuitive, especially for live gigs or karaoke sessions.
The effects processor is a nice touch, letting me spice up my mixes on the fly.
Of course, since it’s a traditional analog mixer, it’s not plug-and-play perfect. You need to be mindful of operation errors, especially with the system’s sensitivity.
But overall, it’s a versatile, reliable choice for anyone needing a compact, feature-rich mixer that handles multiple devices and offers decent sound quality.
What is a Studio Console and Why is it Essential for Recording?
A studio console, also known as a mixing console or audio mixing desk, is an essential piece of equipment in music production and sound engineering. It serves as the central hub for managing audio signals, allowing sound engineers to mix, process, and control the various audio inputs from microphones, instruments, and other sources, facilitating the creation of high-quality sound recordings.
According to the Recording Academy, a studio console provides critical functionality by enabling multiple audio sources to be blended together and processed through various effects and equalization settings, making it an indispensable tool in both studio and live sound environments.
Key aspects of a studio console include its ability to offer numerous input channels, each equipped with controls for volume, panning, EQ (equalization), and effects routing. Additionally, modern consoles come with digital interfaces that allow for seamless integration with digital audio workstations (DAWs), which are software platforms used for recording, editing, and producing audio. The design and layout of a console can significantly affect workflow, as an intuitive interface can facilitate faster mixing and enhance creativity during the recording process.
The impact of using the best studio console is profound, as it directly influences the sound quality of recordings and live performances. A high-quality console can enhance sound clarity and depth, allowing for more nuanced mixes that can captivate listeners. Furthermore, with advancements in technology, many contemporary studios are adopting hybrid systems that combine analog and digital consoles to leverage the strengths of both, thus providing greater flexibility and versatility in sound production.
The benefits of investing in a quality studio console extend beyond just improved audio quality. It can streamline the recording process, enhance collaboration among musicians and sound engineers, and ultimately contribute to more satisfying creative outcomes. For instance, a well-designed console can significantly reduce the time spent on mixing, allowing artists to focus more on the creative aspects of their projects.
Best practices for utilizing a studio console include ensuring proper setup and calibration to match the acoustics of the recording environment, regularly maintaining the hardware to prevent signal degradation, and training personnel to maximize the console’s capabilities. Engaging in continuous learning about the latest technologies and techniques can also empower sound engineers to leverage their studio consoles effectively, leading to superior audio productions.
What Features Should You Look for in a Studio Console?
Sound Quality: The sound quality of a studio console is paramount; it should deliver pristine audio reproduction with minimal noise and distortion. High-quality preamps and converters are essential components that significantly affect the clarity and richness of the recorded sound.
Built-in Effects: Built-in effects can greatly enhance the recording and mixing process by providing immediate access to reverb, delay, and other sonic enhancements. This feature not only saves time but also inspires creativity by allowing artists to experiment with sound design in real-time.
Routing Options: Effective routing options enable audio signals to be directed to multiple outputs and effects, which is essential for complex setups and live performances. This flexibility allows sound engineers to create intricate soundscapes and manage audio flows efficiently.
User Interface: A user-friendly interface with clear labeling and logical layout helps users navigate the console with ease, especially under pressure. Quick access to essential controls can significantly improve workflow and reduce the likelihood of errors during recording sessions.
Automation Features: Automation features allow users to program changes in levels, effects, and other parameters throughout a track, resulting in a polished final product. This capability is essential for modern music production, as it facilitates dynamic and complex mixes that can evolve over time.
Compatibility with DAWs: Ensuring that the studio console works smoothly with popular DAWs is critical for a streamlined workflow. Compatibility can facilitate features like track control and plugin management, making the entire recording and mixing process more efficient.
Build Quality: A studio console built with high-quality materials will withstand the demands of daily use in a professional environment. Investing in a well-constructed console not only protects your investment but also ensures that it maintains its performance over time.
How Does Sound Quality Influence Your Choice?
Sound quality is a crucial factor when selecting the best studio console, as it directly impacts the clarity, depth, and accuracy of recordings.
- Frequency Response: The frequency response of a studio console determines how well it can reproduce different sound frequencies. A wide and flat frequency response ensures that all elements of the audio spectrum are captured accurately, which is essential for high-quality recordings and mixing.
- Noise Floor: The noise floor refers to the level of background noise generated by the console itself. A lower noise floor means that the console can capture quieter sounds without interference, leading to cleaner recordings and better overall sound quality.
- Headroom: Headroom is the measure of how much additional signal the console can handle before distortion occurs. A higher headroom allows for louder inputs without clipping, which is particularly important when dealing with dynamic audio sources such as vocals or live instruments.
- Dynamic Range: Dynamic range indicates the difference between the quietest and loudest sounds a console can handle. A greater dynamic range enhances the ability to capture subtle nuances in the audio, making it ideal for genres that require intricate detail, such as classical music or jazz.
- Preamp Quality: The quality of the built-in preamps can significantly affect the overall sound quality of recordings. High-quality preamps provide cleaner gain and better tonal characteristics, which are essential for achieving professional-grade audio.
- EQ and Effects Processing: The quality and flexibility of the equalization (EQ) and effects processing capabilities can greatly influence the sound quality. A console with robust EQ options allows for precise tonal adjustments, while built-in effects can enhance creativity during mixing and production.
- Build Quality: The physical construction of the console can also affect sound quality. Consoles made from high-quality materials tend to provide better durability and stability, which can lead to improved performance over time, ensuring consistent sound quality across various sessions.
What Are the Different Types of Studio Consoles Available?
The different types of studio consoles available cater to various recording needs and preferences.
- Analog Consoles: These consoles are known for their warm sound quality, favored by many traditional studios. They use physical circuitry to process audio signals, which can impart a unique character to recordings that many engineers and producers appreciate.
- Digital Consoles: Digital consoles utilize digital signal processing (DSP) and offer a range of features such as automation and built-in effects. They provide flexibility and ease of use, making them suitable for modern recording environments where precision and versatility are essential.
- Hybrid Consoles: Combining both analog and digital technologies, hybrid consoles offer the best of both worlds. They allow users to enjoy the warmth of analog sound while benefiting from the functionality and features of digital systems, making them a popular choice among professionals seeking a comprehensive solution.
- Control Surfaces: These devices provide a tactile interface to control digital audio workstations (DAWs) without traditional mixing console features. Control surfaces are ideal for users who prefer mixing in the box but want the hands-on experience of a hardware console.
- Modular Consoles: Modular consoles allow users to customize their setup by adding or removing modules based on their specific needs. This flexibility makes them appealing for studios that require a tailored solution to accommodate various recording tasks and workflows.
How Can You Choose the Best Studio Console for Your Needs?
Choosing the best studio console involves several key considerations to ensure it meets your specific recording and mixing needs.
- Sound Quality: The fidelity and clarity of the audio signal are paramount when selecting a studio console. Look for consoles with high-quality preamps and converters that can accurately capture and reproduce sound without introducing unwanted noise or distortion.
- Number of Channels: Depending on your recording needs, the number of channels in a console is crucial. More channels allow for multiple instruments and vocal tracks to be recorded simultaneously, making it easier for larger sessions or complex arrangements.
- Routing Options: Flexible routing capabilities are essential for managing audio signals effectively. A console that offers various routing options, such as aux sends, subgroups, and direct outs, allows for greater control over signal flow and processing during mixing.
- Physical Layout: The ergonomics and design of the console can greatly affect workflow. A well-laid-out console with easy access to faders, knobs, and controls will enhance your efficiency and comfort during long recording sessions.
- Integration with DAW: Modern studio consoles often need to work seamlessly with digital audio workstations (DAWs). Ensure that the console you choose has the necessary connectivity, such as MIDI or USB, to integrate smoothly with your existing software setup.
- Budget: Your budget will significantly influence your options. It’s important to balance quality and features with what you can afford, keeping in mind that investing in a reliable console can improve your studio’s overall performance.
- Brand Reputation: Consider the reputation of the manufacturer and the support they offer. Brands known for their quality and reliability often provide better warranty options and customer service, which can be vital for long-term use.
What Are the Best Studio Consoles Recommended by Industry Professionals?
The best studio consoles recommended by industry professionals are:
- Avid S6: This modular console is designed for flexibility and can accommodate various workflows, making it a favorite among top studios.
- SSL AWS 924: Known for its high-quality analog sound, the SSL AWS 924 combines the best of both analog and digital worlds, offering advanced features for mixing and recording.
- Neve 88RS: The Neve 88RS console is renowned for its warm sound and rich tonal characteristics, making it a staple in high-end studios.
- API 1608: This console is celebrated for its classic API sound and versatility, ideal for both recording and live sound applications.
- Yamaha QL1: A compact digital mixer, the Yamaha QL1 provides professional features in a smaller footprint, perfect for mobile setups and smaller studios.
The Avid S6 is a highly acclaimed modular console that allows users to customize their setup to fit their specific needs. It features touch-sensitive faders, high-resolution displays, and seamless integration with various DAWs, making it a powerful tool for both mixing and editing.
The SSL AWS 924 offers a unique blend of analog warmth with digital control, featuring a 24-channel mixing surface and extensive routing capabilities. Its built-in DAW control allows for easy integration with software, making it a versatile choice for modern studios.
The Neve 88RS is celebrated for its impeccable sound quality and robust build, featuring classic Neve preamps and EQs that deliver a rich, musical tone. This console is often used in high-profile recording sessions and is revered for its ability to enhance the sonic character of recordings.
The API 1608 is known for its straightforward design and legendary sound, providing a simple yet powerful mixing environment. It offers discrete analog circuitry and a 16-channel layout, making it suitable for both tracking and mixing, with the ability to easily integrate with outboard gear.
The Yamaha QL1 is a digital mixer that stands out for its compact design and professional features. It includes a user-friendly interface with touchscreen capabilities and extensive processing options, making it ideal for live sound applications and small studio setups while maintaining high-quality audio performance.
How Do You Properly Maintain and Care for Your Studio Console?
Proper maintenance and care for your studio console will ensure its longevity and optimal performance.
- Regular Cleaning: Keeping the surface and controls of your studio console clean is essential to prevent dust and grime buildup.
- Check Connections: Regularly inspect all cables and connections to ensure they are secure and free from wear or damage.
- Software Updates: Stay updated with the latest firmware and software updates to ensure your console operates smoothly and benefits from any new features.
- Humidity and Temperature Control: Maintaining a stable environment with appropriate humidity and temperature levels can prevent moisture damage and electronic component wear.
- Calibration: Periodically calibrate your studio console to ensure accurate sound reproduction and control responsiveness.
Regular cleaning involves using a soft, lint-free cloth to wipe down the surface and knobs, while avoiding harsh chemicals that could damage the finish. It’s also important to clean around faders and buttons to prevent sticky or unresponsive controls.
Checking connections involves ensuring that all input and output cables are securely attached and in good condition. Loose or frayed cables can lead to poor audio quality or signal loss, making it important to replace any damaged cables promptly.
Software updates can enhance functionality and fix bugs, so it’s crucial to regularly check the manufacturer’s website for any available updates. This may also involve updating any associated software that integrates with the console.
Humidity and temperature control is vital, as excessive moisture can lead to corrosion, while extreme heat can damage electronic components. A climate-controlled studio environment is ideal for protecting your equipment.
Calibration should be performed according to the manufacturer’s instructions, ensuring that all levels are set correctly for optimal performance. Regular calibration helps maintain accuracy in sound mixing and monitoring, which is essential for high-quality production.
What Common Mistakes Should You Avoid When Buying a Studio Console?
When purchasing a studio console, there are several common mistakes to avoid to ensure you make the best choice for your needs.
- Ignoring Your Needs: It’s essential to clearly define your requirements before shopping. Consider the type of projects you’ll be working on, the number of inputs and outputs you need, and any specific features that are crucial for your workflow.
- Overlooking Build Quality: Many buyers focus solely on features while neglecting the console’s construction. A well-built console will not only last longer but also provide a more reliable performance, which is critical in a studio environment.
- Neglecting Compatibility: Ensure the console you choose is compatible with your existing equipment and software. Incompatibility can lead to issues with connectivity and functionality, ultimately hindering your production process.
- Focusing Only on Price: While budget is a significant consideration, opting for the cheapest option can lead to compromises in quality and functionality. It’s often wiser to invest in a mid-range console that offers more reliable features and durability.
- Not Testing Before Buying: Purchasing a studio console without testing it can lead to dissatisfaction. If possible, visit a store to try out different models, paying attention to the feel of the controls and the overall user experience.
- Overcomplicating Your Setup: Choosing a console with too many features you don’t need can complicate your setup and workflow. It’s better to select a model that fits your current needs and allows for future upgrades without overwhelming you.
- Failing to Research Brands: Not all brands are created equal, and some may not offer the reliability or customer support you require. Conduct thorough research on reputable brands and read user reviews to gauge the experiences of other professionals.