Many users assume that choosing the best controller map for Valorant is all about quick reflexes, but I’ve tested numerous accessories that go beyond just speed. One standout is the Valorant Controller Agent-Inspired Keycap – Custom PBT. It’s not your typical keycap; it’s designed with authentic agent symbols and stylized details that boost your gaming vibe. I’ve used it on different mechanical keyboards and found it’s built tough—thanks to high-quality PBT material, it resists shine and lasts through intense matches.
This keycap’s real strength is its precise fit and aesthetic appeal. It fits most Cherry MX and compatible switches, making it versatile for various setups. Plus, the tactile texture offers a confident, satisfying press during clutch moments. After thorough comparison, this product stood out because it combines durability, style, and compatibility at an excellent price. It’s a game-changer for anyone wanting to customize their setup and show off their main agent. Honestly, I recommend it as a must-have for serious Valorant players who want both function and flair.
Top Recommendation: Valorant Controller Agent-Inspired Keycap – Custom PBT
Why We Recommend It: This keycap’s detailed agent-inspired design enhances immersion without sacrificing durability, thanks to its high-quality PBT construction. Its compatibility with Cherry MX and other switches ensures smooth performance across various mechanical keyboards. Unlike cheaper alternatives, it resists shine and maintains a premium feel, even after extended use. The stylized symbols add a unique personal touch, making it a perfect gift for streamers or esports enthusiasts aiming to elevate their setup.
Valorant Controller Agent-Inspired Keycap – Custom PBT
- ✓ Sharp, detailed agent designs
- ✓ Durable PBT material
- ✓ Easy to install
- ✕ Limited to certain key positions
- ✕ Slightly pricey for a single keycap
| Material | High-quality textured PBT plastic |
| Compatibility | Cherry MX and compatible switches (Gateron, Kailh, etc.) |
| Layout Compatibility | Full-size, TKL, 75%, and 60% keyboard layouts |
| Design Inspiration | Agent-inspired stylized symbols and designs from Valorant |
| Application | Custom keycap for ESC, Enter, or WASD keys |
| Dimensions | Standard keycap size compatible with most mechanical keyboards |
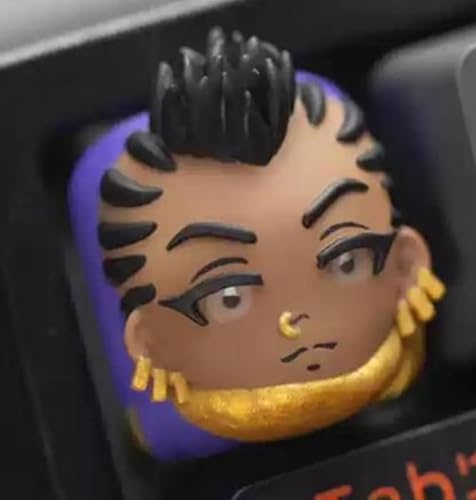
Unboxing this Valorant Controller-Inspired Keycap immediately caught my eye. The intricate design and bold colors made it feel like holding a tiny piece of the game itself.
The textured PBT plastic has a solid weight, giving it a premium feel right out of the box.
Its stylized agent symbols—whether it’s Omen’s shadowy silhouette or Viper’s toxin motif—are sharply detailed. You can really tell each design is crafted with care, adding a touch of personality to your keyboard.
It fits snugly onto Cherry MX and compatible switches, which means it’s compatible with most mechanical setups.
Placement was a breeze, and I appreciated how stable it felt during intense gaming sessions. The textured surface helps grip your fingers, preventing slips even during frantic moments.
It’s perfect for customizing keycaps like ESC, Enter, or your favorite WASD keys, making your setup stand out.
The PBT material resists shine, so it stays looking fresh even after hours of gameplay. Plus, at just under $18, it’s an affordable way to elevate your gaming aesthetic.
Whether you’re a streamer or a hardcore fan, this keycap adds a unique touch that’s both functional and collectible.
Overall, I found it to be a high-quality, visually striking piece that enhances your keyboard’s look without sacrificing durability. It’s a fun way to showcase your main agent and add some flair to your gaming station.
If you love Valorant or want a standout mod, this is a solid pick.
Which Controllers Are Most Effective on Bind?
The most effective controllers on Bind in Valorant are:
- Viper: Viper excels on Bind due to her ability to control sightlines and areas with her Toxic Screen and Poison Cloud.
- Omen: Omen’s teleportation abilities allow for flexible positioning and unexpected flanking opportunities, making him a strong choice on Bind.
- Brimstone: Brimstone’s ability to deploy smokes with Sky Smoke and his impactful orbital strike can dominate key areas and provide utility for his team.
Viper is particularly effective on Bind because her Toxic Screen can obscure vision across long sightlines, making it difficult for enemies to engage effectively. Her Poison Cloud can be strategically placed to deny areas or force enemies to reposition, allowing her team to take control of critical spots.
Omen’s unique abilities, such as Shadow Step and Paranoia, allow him to create confusion and disrupt enemy plans. His ability to teleport behind enemy lines or to reposition quickly makes him unpredictable, which is especially advantageous in a map like Bind where flanking routes are abundant.
Brimstone stands out due to his ability to cover large areas with his smokes, which can help his team execute strategies without being exposed to enemy fire. His ultimate, the Orbital Strike, can clear out entrenched enemies, making it easier for his team to take or retake sites on Bind.
What Unique Tactical Advantages Does Bind Offer Controllers?
Bind offers several unique tactical advantages for Controllers in Valorant, enhancing their ability to control sightlines and manipulate the battlefield.
- Teleporters: Bind’s teleporters allow Controllers to strategically reposition themselves and their utility, creating unexpected angles and disrupting enemy plans.
- Smokes on Key Choke Points: The map features critical choke points that can be effectively blocked using smokes, providing cover for teammates and hindering enemy sightlines.
- Verticality and Sightlines: Bind’s layout includes elevated positions and long sightlines, enabling Controllers to utilize their abilities to control these areas and dictate engagements.
- Site A and B Dynamics: The distinct layouts of Sites A and B allow Controllers to effectively use their utility to support bomb plants and defusals, creating opportunities for team plays.
- Synergy with Duelists: Controllers can enhance the effectiveness of Duelists by providing them with cover and safe entry points, making it easier for aggressive plays to succeed.
Teleporters: The teleporters on Bind create dynamic opportunities for Controllers to confuse and outmaneuver opponents. By placing smokes or other utility near teleporters, they can set traps or retreat safely, allowing for creative plays that can turn the tide of a round.
Smokes on Key Choke Points: Controllers can utilize their smoke abilities to cover crucial areas like the doors on A site or the pathways leading to B site. This control not only protects advancing teammates but also limits the visibility and information available to the enemy team, making it more difficult for them to execute their strategies.
Verticality and Sightlines: The height differences on Bind give controllers the chance to dominate sightlines from higher ground. They can place smokes or other utility to block sightlines from elevated positions, allowing their team to safely cross or engage without being easily spotted.
Site A and B Dynamics: Each site presents unique challenges and opportunities for Controllers. On A site, for example, smoke can cover the entrance from Hookah, while on B, they can block the sightline from Garden to deny information. This versatility allows Controllers to adapt their strategies depending on the site being attacked or defended.
Synergy with Duelists: By providing necessary cover, Controllers can enable Duelists to take aggressive positions, ensuring they have a safe environment to exploit. This synergy can create openings for favorable trades and push the advantage in engagements, ultimately leading to successful rounds.
How Can Controllers Best Utilize Bind’s Layout?
Controllers in Valorant can maximize their effectiveness on each map by utilizing Bind’s unique layout to control space and manipulate enemy movement.
- Use of Teleporters: Bind features teleporters that can be used strategically to surprise enemies or reposition quickly during engagements.
- Area Denial with Smokes: Proper placement of smokes can block key sightlines and choke points, allowing for safer navigation or site takes.
- Map Control through Utility: Controllers can use their abilities to dominate specific areas, forcing opponents to alter their strategies.
- Verticality Exploitation: Understanding the vertical elements of Bind allows controllers to leverage high ground for better control over engagements.
Use of Teleporters: The teleporters on Bind provide unique opportunities for controllers to create unpredictability. By using abilities like Omen’s Shrouded Step or Brimstone’s smokes near teleporters, controllers can quickly move in and out of fights, catching opponents off guard and creating advantageous situations for their team.
Area Denial with Smokes: Controllers like Astra and Viper can effectively use their smoke abilities to deny vision on critical areas of the map. By blocking off sightlines at common engagement points, they can help their team advance safely, set up ambushes, or cover retreats, making it difficult for the opponent to predict movement.
Map Control through Utility: Utilizing abilities that can clear out areas or slow down enemy advances is crucial in Bind. For instance, Viper’s Toxic Screen can help to control long sightlines while Omen’s Paranoia can be used to instill fear and push enemies back, allowing the team to secure key parts of the map and dictate the pace of the game.
Verticality Exploitation: Bind’s layout includes several elevated areas that can be used to gain a tactical advantage. Controllers can position themselves on high ground to oversee engagements, making it easier to deploy smokes or other abilities effectively while also providing their team with better information on enemy movements.
What Are the Best Controller Strategies for Haven?
The best controller strategies in Haven involve utilizing the unique three-bombsite layout effectively to control areas and support teammates.
- Omen: Omen excels at creating confusion with his teleportation abilities and smokes. His ability to place smokes in critical areas can block sightlines, allowing teammates to push or hold sites more effectively. Additionally, his ultimate can provide crucial information by teleporting to any location on the map, making him versatile in both offense and defense.
- Brimstone: Brimstone’s molotovs and sky smokes are particularly useful on Haven due to the multiple bomb sites. His ability to control areas with his smokes can help secure important angles and provide cover for teammates. Moreover, his orbital strike can clear out entrenched defenders from bomb sites, making it easier for the attacking team to plant the spike.
- Viper: Viper’s toxin abilities are perfect for controlling space on Haven, especially with her poison cloud and snake bites. Her cloud can obscure vision while damaging enemies within it, making it difficult for opponents to hold sites or retake. Additionally, her ultimate creates a zone that enhances her abilities, allowing for a potent area denial strategy that can secure or contest bomb sites effectively.
- Sova: While primarily an initiator, Sova can play a controller role with his recon abilities to gather intel on enemy positions. His drone can scout for enemies while providing crucial information before engagements. His shock darts can also deny space or force enemies out of advantageous positions, aiding in site control and giving his team the upper hand during critical moments.
How Do Haven’s Three Sites Affect Controller Choices?
The three sites in Haven significantly influence the choice of controllers based on their unique layouts and strategic possibilities.
- Site A: Controllers on this site benefit from its open spaces and multiple entry points, allowing for smoke screens and crowd control abilities to effectively cut off sightlines and choke points.
- Site B: This site is often more enclosed, making it ideal for controllers who can deploy area denial abilities to prevent enemy access and secure critical positions, especially around the bomb plant locations.
- Site C: The large area and diverse angles in Site C require controllers who can provide versatile utility, using their abilities to manage long sightlines and create safe passages for teammates during pushes or retakes.
Which Abilities Enhance Control on Haven?
The main abilities that enhance control on Haven in Valorant are:
- Brimstone’s Sky Smoke: Provides large smoke screens that can block enemy sightlines, allowing your team to execute plays safely.
- Omen’s Paranoia: A shadowy projectile that reduces enemy vision and hearing, making it easier for your team to push through chokepoints or retake sites.
- Sova’s Recon Bolt: Reveals enemy locations within a range, enabling your team to gather crucial intel and plan their moves effectively.
- Viper’s Toxic Screen: Creates a barrier of toxic gas that can obscure vision and control areas, forcing enemies to either reposition or risk being exposed.
- Cypher’s Spycam: Allows constant surveillance of key areas, giving your team the upper hand in anticipating enemy movements and strategizing accordingly.
Brimstone’s Sky Smoke is particularly effective on Haven due to the map’s three sites, as it can cover multiple angles and allow for safer site takes or defenses. The smokes can also be deployed from a distance, making it harder for enemies to respond quickly.
Omen’s Paranoia is beneficial for initiating fights, especially in narrow corridors and around bomb sites. By blinding enemies, Omen can help his team gain control of essential areas without immediate retaliation.
Sova’s Recon Bolt is invaluable for gathering intel on Haven, where teams often split up. Its ability to reveal multiple enemies can help in deciding whether to push or hold back, based on the information gathered.
Viper’s Toxic Screen is advantageous for controlling sightlines, particularly on sites that can be approached from multiple angles. By blocking vision, Viper can create safe pathways for her team to navigate and challenge enemies who are forced to react to the gas.
Cypher’s Spycam provides a strategic advantage by monitoring key chokepoints and flanking routes. This allows teams to stay informed about enemy movements and adjust their strategies on the fly, which is critical in a map as dynamic as Haven.
What Makes Split’s Controller Selection Unique?
Split’s controller selection is unique due to the distinct strategies and utility they provide to navigate its verticality and tight spaces.
- Omen: Omen is an adaptable controller who can teleport around the map, providing both strategic positioning and the ability to create confusion among enemies. His smokes can cover key sightlines, allowing teammates to push or hold positions more safely, while his ultimate can gather crucial information or eliminate threats from unexpected angles.
- Brimstone: Brimstone excels in area denial with his incendiary grenades and smokes, which can dominate specific zones on Split. His ability to call in orbital strikes can force enemies out of cover, making it easier for teammates to secure crucial map control, especially in areas like A Site or B Site where chokepoints are prevalent.
- Viper: Viper’s abilities allow her to control space effectively, particularly with her toxic screen that can cut off sightlines and trap enemies within hazardous zones. Her poison cloud can obscure vision and deter pushes, making her particularly effective in controlling mid and sites, especially when combined with her ultimate, which can obscure the entire battlefield.
- Sova: Although primarily classified as an initiator, Sova’s utility can complement controllers on Split by revealing enemy positions and forcing them out of cover. His drone and recon bolts can gather information in key areas, allowing controllers to use their smokes and abilities more effectively, particularly in vertical engagements common on Split.
How Does Split’s Verticality Change Controller Dynamics?
Split’s unique verticality significantly impacts controller dynamics by altering how teams strategically execute plays. The vertical nature of the map provides distinctive opportunities and challenges for controllers, making their utility deployments crucial for maintaining map control.
Key aspects of Split’s verticality for controllers include:
-
Elevated Sightlines: The double-height levels create zones where controllers can utilize abilities like smoke screens and slow orbs more effectively, covering both high and low ground angles. For example, Omen can teleport to elevated positions for superior vantage points, enhancing his smokes’ effectiveness.
-
A Site Dynamics: On A-site, the elevated rafters offer controllers like Brimstone and Viper optimal spots to deploy smokes that can obscure enemy sightlines while maintaining a hold on bomb sites. A well-placed stim beacon combined with strategic use of smokes can amplify pressure on attackers.
-
B Site Challenges: On B-site, the vertical nature allows defenders to control the ascent via elevated platforms. Controllers can deploy utility to slow or hinder progress from enemies attempting to ascend from the lower levels.
Overall, the vertical layout of Split demands controllers to think creatively and adapt their utility usage to leverage both their abilities and the map structure effectively.
What Controller Utilities are Key to Navigating Split?
The controller utilities that are key to navigating split include a variety of abilities that help manage space, control sightlines, and facilitate team movement.
- Smokes: Smokes are essential for blocking enemy sightlines and providing cover for teammates to move safely. On Split, controllers like Omen and Viper can deploy smokes strategically to obscure main chokepoints, allowing for safer bomb plants or flanking maneuvers.
- Slow Orbs: Abilities like Viper’s Toxic Screen or Sage’s Barrier Orb can be used to slow down enemy advances and control areas effectively. By placing these utilities at critical points on Split, players can delay pushes and force opponents to engage on unfavorable terms.
- Wall Abilities: Walls, such as those from Viper or Sage, can significantly alter the dynamics of a round by segmenting the map. By creating barriers, players can cut off sightlines and isolate opponents, making it easier to execute strategies or defend bomb sites.
- Recon Tools: Recon abilities like Sova’s Drone or Cypher’s Spycam can be invaluable for gathering information about enemy positions. On Split, these tools allow teams to detect enemy movements through key choke points, enabling more informed decision-making and better coordination during pushes or defenses.
- Flashes: While not exclusive to controllers, flash utilities from agents like Astra or Omen can be used to disorient enemies during critical engagements. Utilizing flashes effectively on Split can open up opportunities to take control of mid or to execute site hits while the enemy is temporarily blinded.
Which Controllers Excel on Ascent?
The best controllers to excel on Ascent in Valorant are:
- Omen: Omen’s ability to teleport and create smokes allows for versatile map control and strategic plays.
- Brimstone: With his ability to call in smokes and molotovs, Brimstone can effectively control sightlines and deny enemy advances.
- Sova: Sova’s recon abilities make him an excellent choice for gathering intel and revealing enemy positions across Ascent’s open spaces.
- Viper: Viper can dominate areas with her toxic screen and molotov abilities, providing great zone control and area denial.
Omen: Omen is particularly effective on Ascent due to the map’s numerous sightlines and open areas. His smokes can block vision on key choke points, while his teleportation ability allows for unexpected flanks or quick escapes, making him a versatile and unpredictable threat.
Brimstone: Brimstone thrives in controlling the battlefield with his sky smoke and incendiary abilities, which are crucial on Ascent’s wide lanes. His ability to deploy smokes from a distance helps in executing strategies or defending bomb sites, while his ultimate can clear out an area, forcing enemies to reposition.
Sova: Sova is indispensable on Ascent for his ability to gather crucial information. His drone can scout out enemies hiding in corners, while his recon bolt can reveal their locations, making it easier for teammates to plan attacks or defenses. Additionally, his ultimate can pinpoint enemy locations, providing a strategic advantage during crucial moments.
Viper: Viper’s kit is well-suited for controlling Ascent’s map dynamics, especially in areas like Mid and A site. Her toxic screen can split the map, making it difficult for enemies to push through as they have to navigate around it. Her molotovs can deny plant sites or force enemies out of cover, creating opportunities for her team to capitalize on.
What Ascent Map Features Influence Controller Strategies?
Several ascent map features influence controller strategies in Valorant, impacting how players utilize their abilities to control the battlefield.
- Mid Control: The mid area of Ascent is crucial as it connects both sides of the map. Controllers can use smokes and utility to deny vision and control this central point, allowing their team to either push through mid or rotate effectively.
- Open Areas: Ascent has several wide-open spaces, especially around sites. This makes it essential for controllers to deploy their abilities to block sightlines and provide cover for teammates when executing site takes or defending against pushes.
- Site Structures: The bomb sites in Ascent have unique structures, such as high ground and walls. Controllers can exploit these features by placing smokes or walls to create safe zones for planting and defending the spike, as well as to prevent enemies from using elevated positions to gain an advantage.
- Verticality: With multiple levels and vertical elements, players can utilize controllers’ abilities to block vision from elevated positions. This is especially important for denying sightlines from defenders holding high ground, allowing attackers to move without being exposed.
- Flank Routes: Ascent has various flanking paths that can be used to surprise opponents. Controllers must be strategic about placing utility to cover these routes, restricting enemy movement and ensuring their team can hold positions effectively.
- Sound Cues: The map’s layout affects how sound travels, making it vital for controllers to consider sound cues when deploying abilities. Using utility while being mindful of sound can prevent giving away their position or strategies to the enemy team.
How Can Controllers Optimize Their Impact on Ascent?
Controllers play a crucial role in optimizing team strategies on each map in Valorant by utilizing their abilities to control space and influence engagements.
- Split: On Split, controllers like Omen and Viper excel due to their ability to block sightlines and control mid, which is crucial for securing map control. Omen’s smokes can effectively cover key areas, allowing teammates to safely execute strategies or rotate, while Viper’s toxic screen can deny vision and space during attacks.
- Breeze: For Breeze, Astra shines as her abilities can manipulate large areas effectively, making it easier to control the long sightlines. By using her stars to create gravity wells or smokes, Astra can disrupt enemy movements and provide cover for her team, facilitating strategic positioning and engagements in open areas.
- Haven: Haven’s unique three-bomb site layout makes controllers like Brimstone particularly effective. His ability to deploy smokes on multiple sites simultaneously allows for versatile defensive and offensive plays, creating opportunities for flanks or safe bomb plants while obstructing enemy visibility.
- Ascent: In Ascent, Omen can use his teleportation abilities to create unpredictability in engagements. His smokes can cover key choke points such as Mid and A site, enabling teams to execute strategies or rotate effectively, while also providing opportunities for aggressive plays by catching enemies off guard.
- Icebox: Viper is particularly powerful on Icebox, where her abilities can control verticality and open spaces. Her wall can block sight lines from elevated positions, while her poison cloud can deter enemies from pushing through tight corridors, allowing her team to maintain control over critical areas of the map.
- Bind: On Bind, controllers can utilize their abilities to manage teleporters effectively. Omen can create smokes that block sightlines near teleporters, disrupting enemy positioning and allowing teammates to safely enter or exit zones, which is crucial for surprise tactics and map control.
What Controllers Are Ideal for Icebox?
The ideal controllers for the Icebox map in Valorant are those that can effectively utilize the verticality and diverse environments of the map.
- Omen: Omen’s teleportation abilities allow him to navigate Icebox’s multi-level terrain effectively. His smokes can obscure sightlines and create confusion, which is particularly useful in the open areas of the map.
- Sova: Sova’s reconnaissance tools, including his drone and owl drone, are invaluable on Icebox for gathering information on enemy positions. His ultimate ability can also reveal enemies across the map, making him a great asset for planning attacks or defenses.
- Brimstone: Brimstone’s ability to call in airstrikes can be particularly effective on Icebox, where strategic control of areas can be crucial. His smokes can cover key chokepoints and pathways, allowing teammates to push or hold positions safely.
- Viper: Viper thrives on Icebox due to her ability to control areas with her toxic screen and poison cloud. Her ultimate can deny enemy movement in crucial areas, allowing her team to dominate specific zones on the map.
What Environmental Challenges Do Icebox’s Map Elements Present?
The environmental challenges presented by Icebox’s map elements in Valorant can significantly impact gameplay and strategy.
- Verticality: Icebox features multiple levels and vertical structures that create opportunities for both attackers and defenders to gain advantageous positions. Players must be adept at utilizing ziplines and climbing walls to navigate these elevations effectively, which can lead to unexpected engagements and surprise flanks.
- Wide Open Spaces: Certain areas of Icebox are characterized by vast, open spaces that leave players exposed to sniper fire and long-range engagements. This requires teams to develop strategies that effectively utilize cover and movement to minimize vulnerabilities while attempting to control key zones.
- Environmental Hazards: Icebox has various environmental elements like fire and ice that can deal damage to players. Understanding how to maneuver around these hazards is crucial, as they can be used strategically to zone out enemies or force them into unfavorable positions.
- Cluttered Layout: The map’s intricate design features numerous tight corridors and obstacles that can obstruct sightlines and movement. Players must learn to navigate these areas efficiently, as they can lead to ambushes or disrupt team formations during engagements.
- Bomb Site Design: The layout of the bomb sites on Icebox includes unique features like elevated platforms and complex angles. This complexity requires teams to coordinate their approaches carefully, balancing the need for site control with the risk of being flanked or caught out of position.
How Can Controllers Leverage Icebox’s Layout for Success?
Controllers can leverage Icebox’s layout for success by understanding the unique characteristics of the map that enhance their utility and team dynamics.
- Verticality: Icebox has multiple levels and vertical spaces that controllers can utilize to control sightlines and create advantageous positions.
- Obstacles and Cover: The presence of various obstacles, such as boxes and walls, allows controllers to set up effective utility to block enemy sightlines or create safe passage for teammates.
- Bomb Site Layout: Each bomb site on Icebox is designed with unique features that can be exploited by controllers to set traps and control the area during engagements.
- Rotations and Flanks: The layout encourages strategic rotations and flanking opportunities that controllers can use to surprise opponents and gain map control.
Verticality: The vertical nature of Icebox provides controllers with opportunities to create high ground advantages, which can be pivotal in engagements. Utilizing abilities that can either deny access or provide elevation can help in holding key positions effectively, allowing for better map control and overwhelming enemy positions.
Obstacles and Cover: The diverse range of obstacles on Icebox allows controllers to deploy their utility in creative ways, such as using smokes to obscure sightlines or placing barriers to block enemy movement. This creates zones where enemies are hindered, enabling the controller’s team to capitalize on the disorientation and gain the upper hand in fights.
Bomb Site Layout: Each bomb site has distinct features, such as the open space on A site and the enclosed area on B site, which require different strategies from controllers. By understanding these layouts, controllers can effectively use their abilities to secure sites during attacks or retakes, ensuring they can either defend or support the team in planting or defusing the spike.
Rotations and Flanks: Icebox’s design facilitates quick rotations and flanking maneuvers, which controllers can leverage to outsmart opponents. By anticipating enemy movements and positioning themselves strategically, controllers can create opportunities for surprise engagements, allowing their team to gain momentum and control of the match.
What Are the Best Controller Tactics for Breeze?
The best controller tactics for Breeze revolve around utilizing the unique features of the map to effectively manage space and control enemy movements.
- Viper’s Toxic Screen: Viper excels on Breeze by using her Toxic Screen to block sightlines across long corridors and open areas. This tactic can effectively isolate enemy teams, making it easier for your team to take control of sites or force enemies into unfavorable engagements.
- Brimstone’s Sky Smoke: Brimstone’s ability to deploy smokes across key lanes can significantly hinder enemy visibility on Breeze. By strategically placing smokes to cover common sightlines during site executes or retakes, you can create opportunities for your team to safely maneuver and secure objectives.
- Omen’s Shrouded Step: Omen’s teleportation ability allows for unpredictable positioning, which is crucial on a map like Breeze that features wide open spaces. By using Shrouded Step to reposition or flank, Omen can catch opponents off guard and create openings for his team to capitalize on.
- Killjoy’s Turret and Alarmbot: Killjoy can use her turret and Alarmbot to cover flanks and gather intel, which is especially useful on a larger map like Breeze. Placing the turret in strategic locations can help control choke points, while the Alarmbot can alert your team to incoming enemies and slow them down, making it easier to respond.
- Sova’s Recon Bolt: Sova’s Recon Bolt is invaluable for gathering information on Breeze, where sightlines can be extensive. By sending a Recon Bolt into common hiding spots or areas of interest, you can reveal enemy positions and allow your team to make informed decisions on how to approach engagements.
How Does the Size of Breeze Influence Controller Effectiveness?
The size of breeze can significantly influence the effectiveness of controllers in Valorant, as the map’s unique layout and open spaces require specific strategies and abilities.
- Wide Open Spaces: Breeze features large, open areas that can make it challenging for controllers to effectively block sightlines.
- High Ground Opportunities: The map has various high ground positions which can be utilized by controllers to gain an advantage and control key areas.
- Long Sightlines: The extended sightlines on Breeze necessitate the use of smoke and utility to effectively control engagements from a distance.
- Rotate Options: The multiple rotate paths available on Breeze require controllers to anticipate enemy movements and use their abilities strategically to cover areas.
- Utility Timing: The timing of utility deployment becomes crucial on Breeze due to the larger distances players must cover to engage or disengage from fights.
Wide open spaces on Breeze limit the effectiveness of smokes and other area-denial abilities, as enemies can often maneuver around them. Controllers need to be strategic in placing their utilities to maximize coverage and create safe zones for their team.
The high ground opportunities on Breeze allow controllers to leverage their abilities from elevated positions, providing better visibility and control over engagements. This advantage can be pivotal in holding or retaking sites effectively.
Long sightlines on the map mean that controllers must be adept at using their smokes to block visibility and control enemy sightlines. Well-timed utility can disrupt enemy plans and provide safe passage for teammates.
The rotate options on Breeze complicate controller gameplay, as they must remain vigilant about enemy flanking routes. Smart placement of utilities can help manage these rotations and provide crucial support during engagements.
Utility timing is essential on Breeze given the expansive nature of the map, where quick and effective deployment can turn the tide of a round. Controllers need to coordinate their abilities with their teammates to ensure maximum impact.
What Utility Strategies Work Best on Breeze?
The best utility strategies on Breeze for controllers focus on maximizing area control and providing valuable intel.
- Omen’s Smokes: Omen’s ability to deploy smokes can obscure sightlines across the expansive map of Breeze, allowing for safer advances or retreats. His teleportation ability also enables him to reposition quickly, making it easier to confuse opponents and take control of crucial areas like Mid and A site.
- Brimstone’s Incendiary: Brimstone’s incendiary grenades can be effectively used to deny areas, especially when trying to control the A site or B site choke points. By placing them strategically, he can flush out enemies from cover and force them into unfavorable positions, enhancing his team’s chances of securing a site.
- Viper’s Toxic Screen: Viper excels on Breeze with her Toxic Screen, which can cover long sightlines, making it difficult for enemies to hold angles. Additionally, her ability to create a Viper’s Pit can dominate team fights in key areas, providing a significant advantage in controlling map territory.
- Cypher’s Camera and Trapwire: Cypher’s utility is invaluable for gathering information on Breeze’s large map. His camera can be positioned to cover multiple entry points, while his Trapwires can catch enemies off guard as they attempt to rotate, thus providing crucial intel and control over enemy movements.
- Sova’s Recon Bolt: Sova is particularly effective on Breeze due to the high number of open spaces where his Recon Bolt can reveal enemy positions. By utilizing his drone in combination with Recon Bolts, he can gather significant information, allowing his team to make informed decisions on whether to push or hold back.
Which Controllers Are Best Suited for Fracture?
The best controllers for each map in Valorant can significantly enhance gameplay by leveraging their unique abilities to control space and support teammates effectively.
- Brimstone: His ability to call in airstrikes and deploy smoke clouds makes him particularly effective on maps like Bind and Haven.
- Viper: Viper excels on maps like Split and Icebox due to her toxic screen and snakebite abilities, which can block vision and control specific areas.
- Omen: Omen’s teleportation abilities and smokes are well-suited for maps such as Ascent and Breeze, allowing him to maneuver around and gather information stealthily.
- Sova: While primarily an initiator, Sova can control areas on maps like Fracture and Icebox with his recon abilities, providing essential intel for his team.
- Cypher: Cypher’s utility shines on maps like Split and Haven, where his cameras and traps can provide crucial information and control over key locations.
Brimstone’s airstrike ability, particularly effective in controlling choke points and executing site takes, complements maps like Bind with its multiple teleporters and Haven with its three bomb sites. His smokes also provide excellent cover for strategic plays.
Viper’s skills allow her to dominate on Split, where verticality and tight choke points benefit from her toxic screen, which can block sightlines and deter enemy advances. On Icebox, her snakebite can deny enemies from taking space in critical areas like mid and the bomb sites.
Omen’s unique abilities to teleport and cast smokes provide him with the flexibility to adapt to different situations on Ascent and Breeze, where controlling middle and rotating between sites is crucial. His ultimate ability also allows him to gather intel from anywhere on the map.
While Sova is classified as an initiator, his recon abilities can effectively control areas on maps like Fracture, where the varied terrain and multiple levels make information gathering vital for team success. His drone and owl drone can scout ahead and provide essential intel for executing strategies.
Cypher’s gadgets allow him to maintain control over sites on Split and Haven, where his cameras can offer invaluable information about enemy movements. His traps serve to delay or catch enemies off guard, contributing to a more strategic playstyle, especially in areas with multiple entry points.
What Unique Aspects of Fracture Should Players Consider?
Players should consider several unique aspects of fracture when strategizing for each map in Valorant.
- Verticality: Fracture features significant vertical elements, allowing players to take advantage of high ground for better sightlines and tactical advantages.
- Split Spawn Points: The unique split spawn points create diverse engagement scenarios, requiring players to adapt their strategies based on the location of allies and enemies.
- Teleporters: The teleporters on Fracture enable quick rotations and unexpected flanking opportunities, making map control essential for both attackers and defenders.
- Open Space: The open areas in Fracture can lead to intense gunfights, so players need to be aware of their surroundings and utilize cover effectively to avoid being caught off guard.
- Site Design: Each bomb site has distinct layouts that encourage varied attack and defense strategies, emphasizing the importance of teamwork and communication.
- Utility Usage: Given the map’s unique features, players must think critically about their agent abilities and how best to use them to leverage Fracture’s environment in their favor.
The verticality on Fracture allows players to control high ground, which can be pivotal for gaining an advantage during engagements. Utilizing this aspect effectively can provide better sightlines for snipers and create opportunities for ambushes.
The split spawn points on Fracture mean that players will often find themselves in different locations than their teammates, which can affect early round strategies. Players must communicate effectively to coordinate their movements and capitalize on their advantageous positions.
Teleporters are a defining feature of Fracture, allowing for rapid repositioning that can catch opponents off guard. Mastering the use of these teleporters can lead to successful flanks and surprise attacks that disrupt enemy plans.
Open spaces in Fracture create opportunities for prolonged fights, but they also leave players vulnerable. It’s crucial for players to be aware of potential enemy positions and utilize available cover to avoid being flanked or overwhelmed.
The distinct design of each bomb site on Fracture requires different strategies to secure and defend them. Understanding the layout can lead to effective team strategies that either leverage strengths or exploit weaknesses in the enemy’s defense.
Finally, the unique geography of Fracture demands that players consider their utility use carefully. Abilities that can block vision, create cover, or gather intel become even more important in navigating the specific challenges this map presents.
How Do Controller Abilities Afford Advantages on Fracture?
Each controller in Valorant has unique abilities that provide strategic advantages on Fracture.
- Brimstone: Brimstone’s abilities allow him to control areas effectively, making it easier to secure site entries.
- Omen: Omen’s teleportation abilities create confusion among enemies and allow for flanking opportunities.
- Viper: Viper’s toxins can deny vision and control space, making her particularly effective in the unique layout of Fracture.
- Killjoy: Killjoy’s gadgets can secure flanks and control key areas, providing valuable information and deterrence.
Brimstone’s abilities, particularly his smokes and orbital strike, are crucial for blocking sightlines and controlling choke points on Fracture, where the layout encourages tight engagements. His ultimate can clear sites or force enemies to reposition, giving his team an advantage in securing objectives.
Omen’s teleport allows him to reposition quickly, creating opportunities to surprise opponents and gather intel. His smokes can obscure vision effectively in the unique dual-sided structure of Fracture, allowing teammates to move without being spotted and facilitating site takes or defenses.
Viper excels in controlling areas with her toxic screen and poison cloud, which can be strategically placed to cover key sightlines or create no-go zones for attackers. On Fracture, where verticality and angles play a significant role, her abilities can make it difficult for enemies to push without taking damage or being detected.
Killjoy’s turret and alarmbot can help secure flanks and hold down sites, making them excellent for Fracture’s multi-route approach. Her ultimate, Lockdown, can force enemies out of contested areas, allowing her team to take control or retake sites effectively by eliminating or displacing opponents.
Related Post: